Wireless flash triggers put control of your strobes in your hands without cables — a transmitter on the camera sends a signal to one or more receivers so lights fire in sync with the shutter. That simple link unlocks reliable off‑camera lighting, fast multi‑flash timing and far more flexibility on commercial shoots. In this guide we explain what triggers do, how transmitters and receivers talk to each other, the practical differences between radio‑frequency and infrared systems, and the core features to prioritise when building a studio rig. You’ll find step‑by‑step setup instructions for pairing transmitters with studio strobes, clear notes on how TTL and HSS change exposure choices, and focused troubleshooting tactics for sync issues and interference. We also lay out a decision framework for choosing a system, recommend a test plan for equipment validation, and offer studio‑specific tips for working on a cyclorama or with multiple modifiers. Throughout, key concepts — radio frequency flash trigger, studio flash sync, remote strobe control, TTL flash metering and off‑camera flash groups and channels — are shown with plain examples and practical checklists so you can get reliable wireless control into a professional workflow.
Wireless flash triggers are small transmitter/receiver systems that make a flash fire without a physical cable. A popular example is the `Godox wireless trigger` system, where the transmitter, usually on your camera hot shoe (or wired to the sync port), converts the shutter event into a radio or infrared pulse; receivers on each flash convert that pulse into a firing signal via a hot shoe or PC sync. Using groups and channels, one transmitter can address multiple lights independently, letting you change power for one set of lights while leaving others untouched. The practical result is faster setups, less cable clutter and more creative freedom for product, portrait and commercial work where you need to move lights quickly and repeatably.
Removing cable limits lets you design lighting that would be awkward or slow otherwise — which is why the next sections focus on the trigger types and communication methods that matter in the studio.
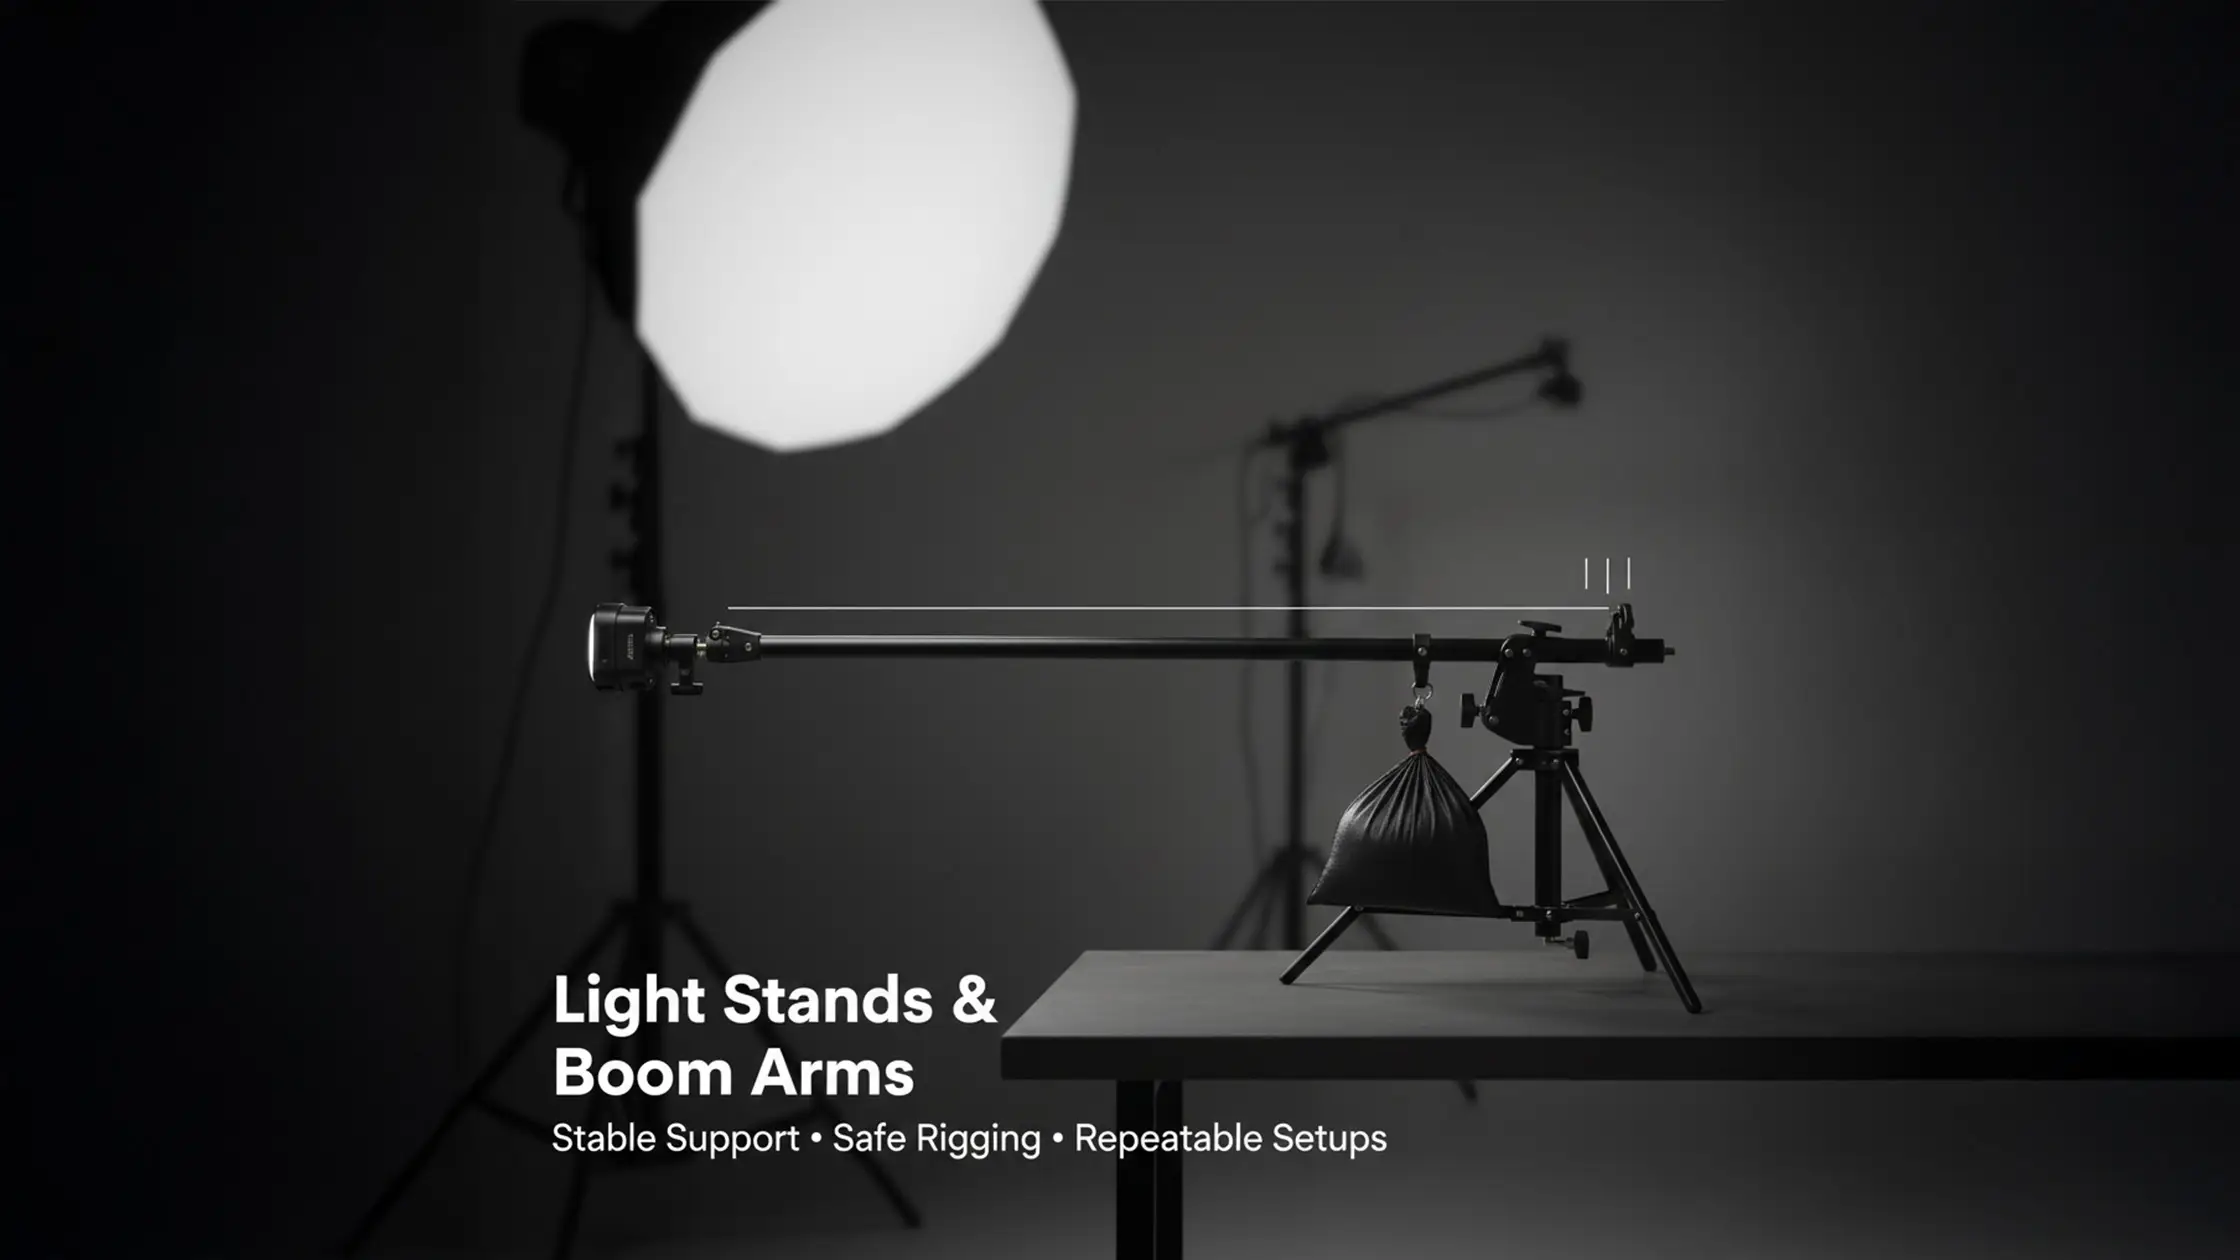
At its core a wireless flash trigger is a paired system: a transmitter on the camera and receivers on the lights. In the studio this lets you run multi‑light setups — product, beauty, fashion and commercial shoots — without crawling around adjusting every head between frames. For beauty work, triggers simplify clamshell setups where precise power control between key and fill is critical, allowing you to refine your lighting without constant adjustments. Triggers make lighting repeatable, speed up setup, and reduce trip hazards from cables, while groups and channels let you control different modifiers and power settings remotely. For commercial work where consistency and time are priorities, good triggering is essential.
Understanding that role makes it easier to decide which signal type and feature set will work best in your own studio environment.
Transmitters and receivers communicate either by radio‑frequency (RF) packets or infrared (IR) pulses. RF broadcasts across a frequency band without needing line‑of‑sight, giving long range and flexible receiver placement; IR needs a clear path and is more sensitive to obstacles and strong ambient light. When shooting on a cyclorama or with multiple large modifiers, receivers behind softboxes or V-Flats can easily lose IR line-of-sight, leading to misfires. Channels and groups are logical controls layered over the physical link so one transmitter can selectively address multiple receivers. Systems also differ in latency and acknowledgement: lower latency and reliable feedback reduce misfires during fast commercial shoots.Knowing how each mode behaves in a studio helps you pick the right hardware and place receivers to minimise dropouts during complex, multi‑light setups.
For most studio work the real choice is RF versus IR. Radio‑frequency triggers are typically the better pick for studios because they offer range, work without line‑of‑sight and handle multi‑flash control more reliably. IR still has a role for single‑light or very budget‑conscious setups where you can keep clear alignment, but its limits make it less useful for cyc shoots or dense modifier layouts. Your decision should reflect studio size, how many lights you run and how important repeatability is for client work.
Compare the practical trade‑offs in this quick reference table to see how range, line‑of‑sight and reliability differ by type.
That comparison explains why RF systems are the default in professional studios: they combine reliable range with flexible positioning, which matters when receivers sit behind modifiers or across a wide cyclorama. Next we cover the features studio shooters should prioritise.
RF triggers send coded radio packets that pass through or around obstacles; IR triggers send light pulses that need a clear path. Practically, RF gives better range and fewer misfires when stands or softboxes block the camera‑to‑receiver line. IR can be cheap and fine for a single flash close to the camera, but bright studio lights or reflections make it less consistent. IR's reliance on light pulses means strong ambient light, direct sunlight, or even reflections from shiny surfaces can easily overwhelm or scatter the signal, leading to inconsistent firing. For multi‑flash, cyc or location shoots where you move lighting positions, RF is usually the pragmatic choice to keep setups quick and reliable.Choosing the right type means matching hardware to the way you work and the complexity of your shoots.
RF triggers are favoured in studios because they deliver steady triggering across varied positions and modifiers and often include features studios need — multi‑group control, lower latency and, in some systems, TTL pass‑through and HSS. When working on a large cyclorama, for instance, RF's ability to penetrate obstacles ensures consistent firing even when lights are positioned far from the camera or behind large diffusion panels. RF scales cleanly: adding receivers rarely requires rewiring, and group/channel setups let one operator adjust lights remotely. For commercial shoots where time is money, RF’s reliability in busy setups (cycloramas, large modifiers, booms) is a decisive advantage. As vendors like `Godox` add solid HSS and TTL support, RF becomes increasingly indispensable for repeatable studio workflows.
With RF as the baseline, the following section details the specific features to prioritise when buying triggers.
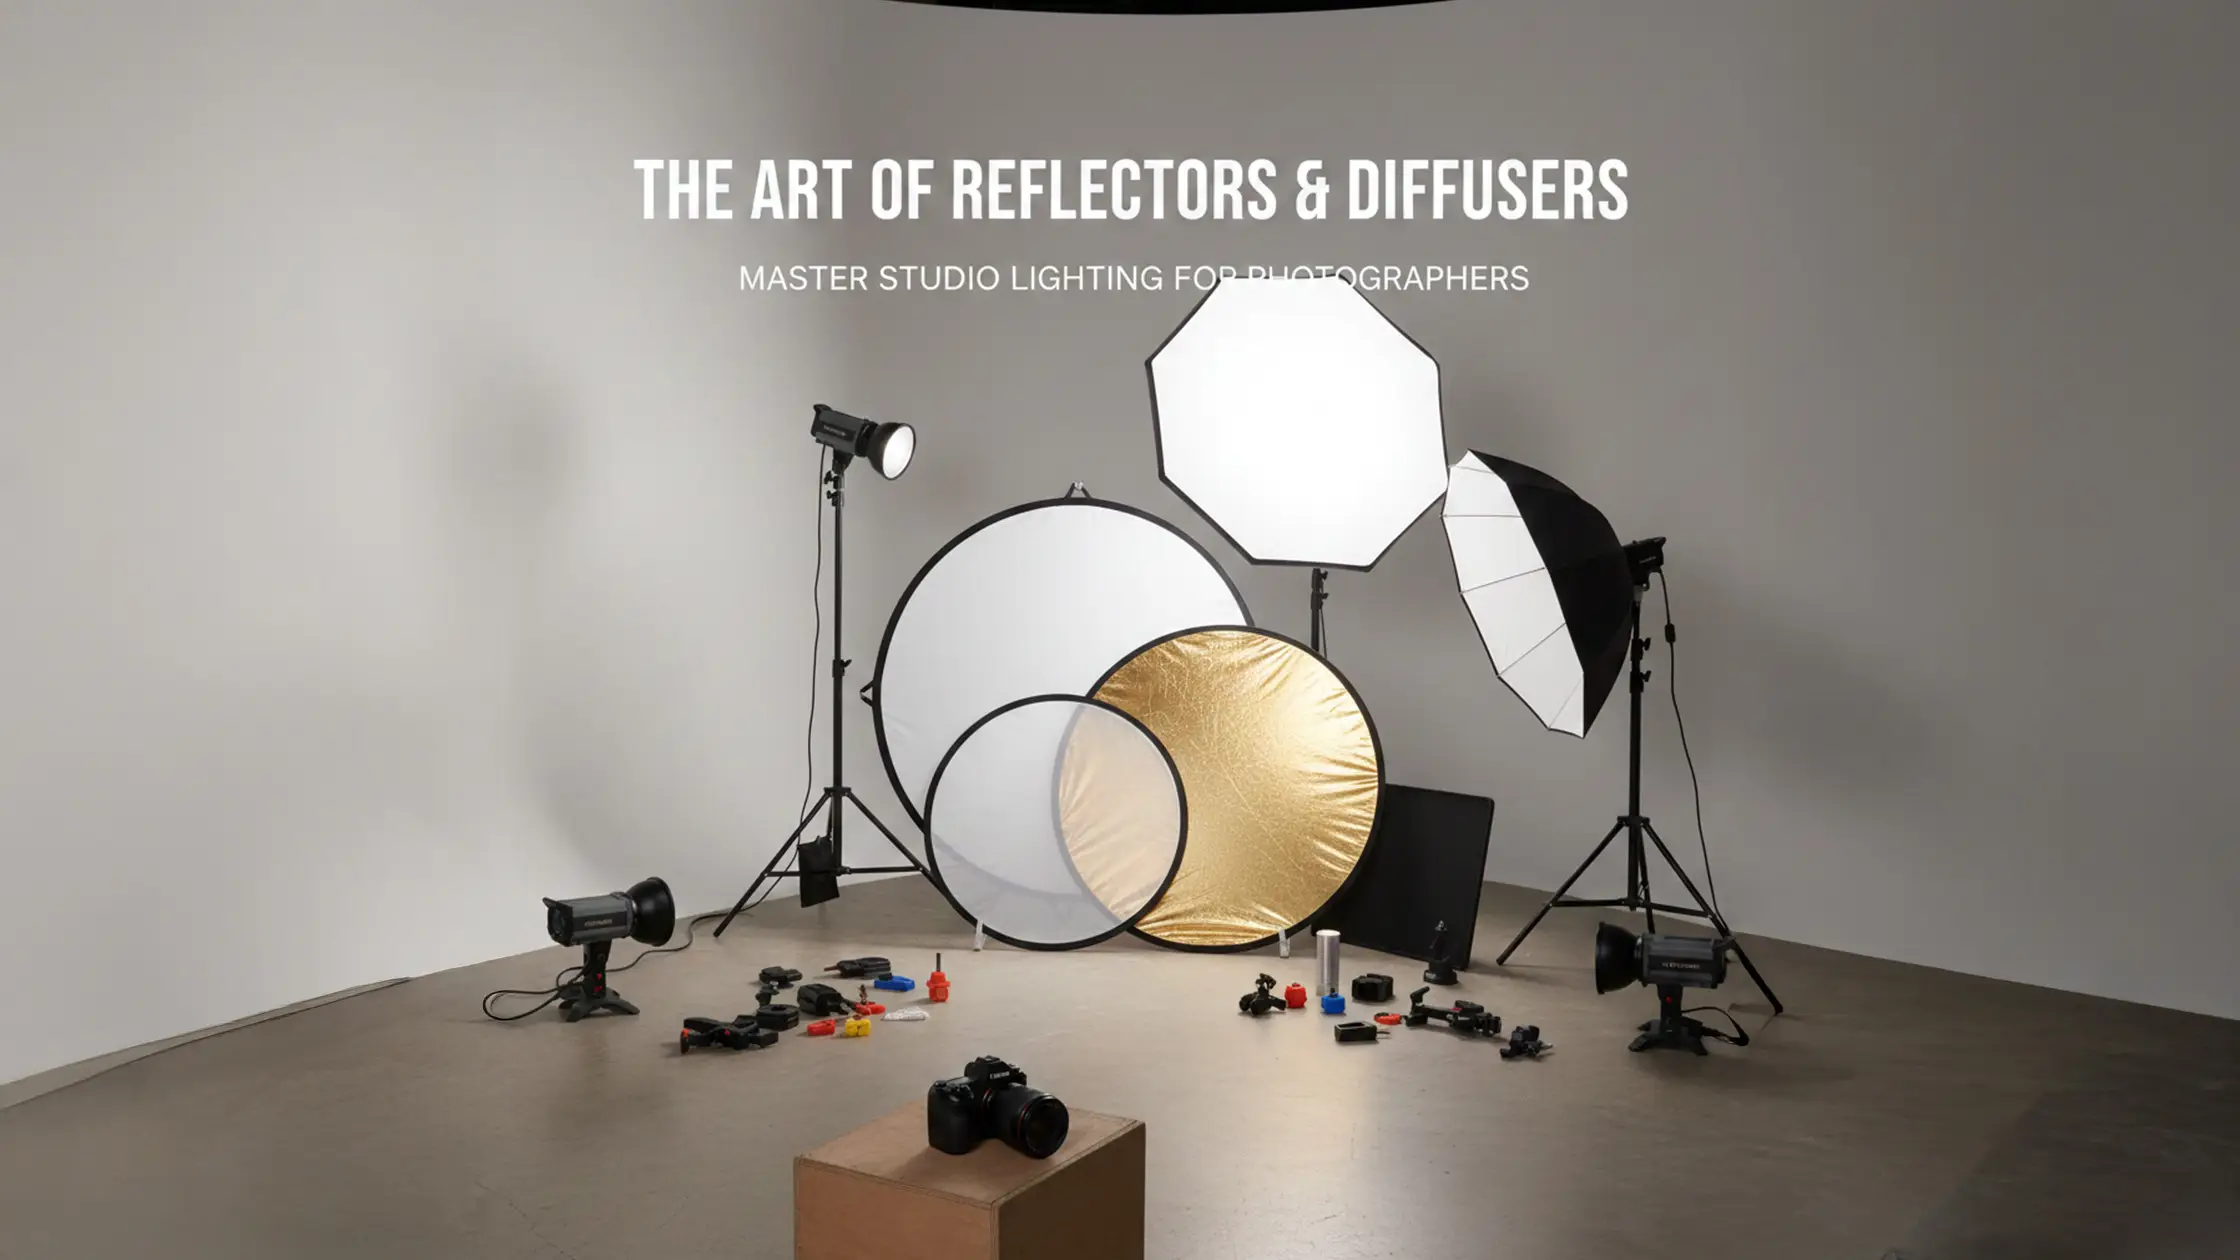
Evaluate a short list of core features — TTL, high‑speed sync (HSS), channels and groups, range/latency, and build/battery reliability — because these directly affect speed, exposure control and session uptime. TTL speeds setup by letting the camera meter flash output, but manual control gives better consistency for final commercial frames. HSS lets you sync above the camera’s native flash speed so you can use wide apertures or blend ambient light, at the cost of reducing effective flash power. Channels and groups are essential for independent control in multi‑light setups; range and low latency matter when you’re working across a large studio floor. Balance these features against budget and which flash/camera ecosystem you use.
Below is a practical mapping of features to studio benefits and examples to help weigh trade‑offs.
This table ties features to the studio outcomes you care about. Next we unpack TTL and HSS so you can decide when to rely on automation and when to lock down manual control.
TTL (Through‑The‑Lens) metering measures exposure through the camera and tells compatible flashes how much output to deliver. It’s a real time saver during run‑and‑gun moments like castings or quick test shoots because it adapts to distance and modifier changes without manual tweaks. While modern TTL systems are highly sophisticated, their output can subtly shift based on changes in subject reflectivity, composition, or even the camera's metering mode. For critical commercial work requiring absolute consistency, manual power settings remain the gold standard, often after using TTL for initial setup speed. Troubleshooting TTL usually means checking camera/trigger compatibility, firmware versions and that the transmitter properly passes TTL signals for your flash ecosystem.
Use TTL to speed the setup phase, then switch to manual for predictable, repeatable results on client deliveries.
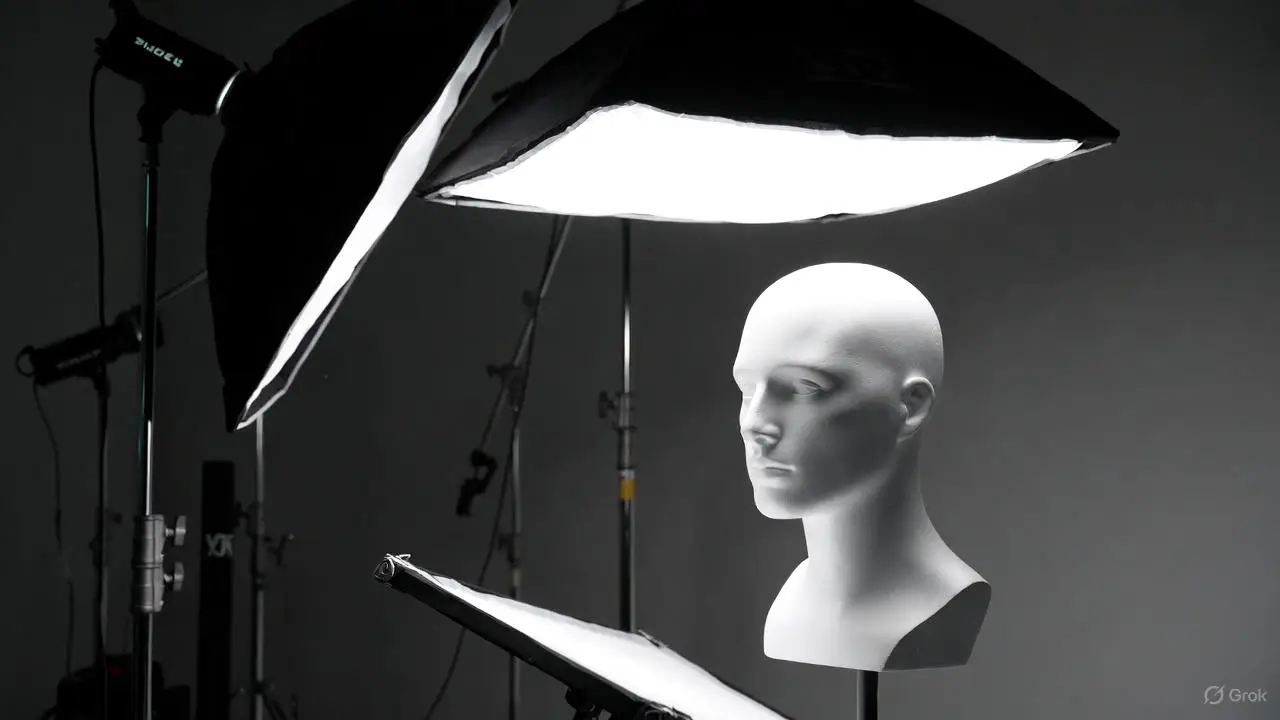
HSS lets a flash operate at shutter speeds above the camera’s native sync by emitting a rapid stream of lower‑power pulses. Instead of a single, powerful burst, the flash emits a rapid series of lower-power pulses that effectively 'paint' the sensor as the shutter curtain travels across it. That lets you use wide apertures in bright conditions or mix flash with strong ambient or window light to preserve background detail. This pulsing mechanism significantly reduces the flash's effective power output, typically by 2-3 stops or more, depending on the shutter speed and flash unit. The downside is lower effective flash power and faster battery drain, which makes HSS less suitable for big studio strobes where manual power offers more headroom. For studio work, especially when blending with natural light, consider if an ND filter on your lens might be a better option than HSS. ND filters reduce ambient light without sacrificing flash power, offering more control over your strobe output, though they do darken the viewfinder. Use HSS deliberately for creative effects and plan for battery and heat management when you rely on portable speedlites.
With those feature priorities in mind, the next section gives a practical setup sequence for pairing transmitters and receivers and testing a multi‑flash studio configuration.
Setting up wireless triggers in the studio is a simple sequence: mount the transmitter, power and pair receivers, assign channels/groups, set camera and flash modes, then run systematic test‑fires to confirm sync and exposure. Start with the transmitter on the camera hot shoe and power on the receivers attached to strobes or speedlites. Follow the manufacturer pairing steps so each receiver links to the transmitter and sits on the correct group. Set your shutter speed, aperture and ISO, enable or disable TTL/HSS based on your workflow, then test each group alone and all together. Finish with a quick safety sweep — tidy cables, check stand stability and clear modifier collisions — to avoid surprises once the client arrives.
Use this checklist during setup to avoid missed steps when preparing a multi‑flash session.
Following that order catches misconfigurations early and gives you a reliable starting point for the shoot. After initial checks, consider how your studio layout affects testing and iteration.
Keep the routine straightforward: mount the transmitter, attach receivers, set channels/groups, pair devices, then test‑fire. First, secure the transmitter on the camera hot shoe and confirm battery status. Next, mount each receiver on the flash or connect it to the strobe’s sync port, and assign groups or channels according to your lighting plan. Most systems pair by putting both transmitter and receiver into pairing mode and confirming a connection via LED or on‑screen feedback. Finally, test each light individually and then together, adjusting power or modifier placement before client frames begin. For foundational knowledge on flash photography and studio setup, understanding essential tips for beginners will complement your trigger setup process.
This sequence isolates faulty hardware early and makes scaling from one flash to a multi‑light setup much smoother.
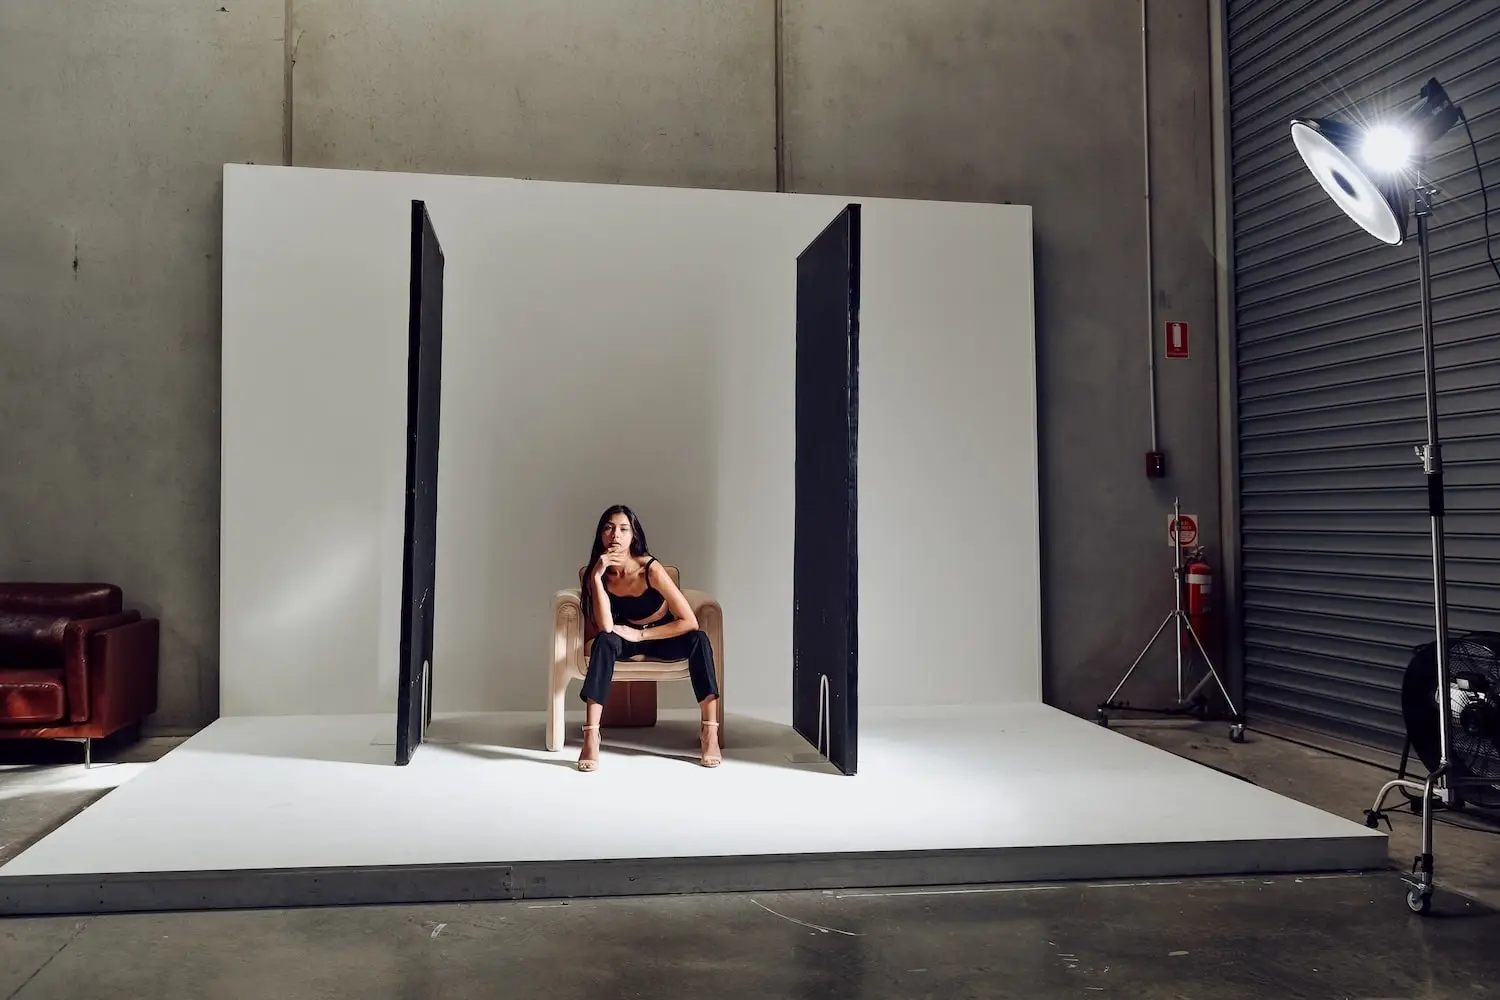
For those wanting to test equipment in a real environment, a self-access studio provides a controlled setting to verify trigger reliability and dial in placement strategies before production shoots. Studio hire typically starts from $109/hour, offering a low-risk way to mount receivers, exercise group/channel behaviour, and iterate modifier placement without client pressure. Such facilities, like those found in Cheltenham (Bayside Melbourne), often include professional lights and a white cyclorama, and operate on a self-access model with a unique entry code for uninterrupted testing.
Testing in a dedicated studio environment confirms real‑world behaviour and helps you deliver repeatable lighting for client work.
Common problems include misfires, inconsistent TTL, RF interference and latency in complex group setups. Troubleshooting works best when you isolate components: test the camera with a known‑good transmitter, test each receiver with a standalone flash, replace batteries and switch channels to rule out interference. In practice, channel selection matters more than manufacturers suggest—nearby WiFi or other wireless devices can cause intermittent misfires on certain frequencies, especially in shared studio spaces. Interference from Wi‑Fi or overlapping trigger sets usually shows as intermittent misfires; changing channels, moving the transmitter or repositioning noisy sources can help. A pre‑shoot checklist — batteries, channel checks, test‑fires and stand/safety — will prevent most issues from disrupting production.
A clear diagnostic flow helps you quickly find whether the problem is the camera, transmitter, receiver or flash and get back to shooting with minimal downtime.
This table maps common faults to quick remedies so you can resolve studio trigger issues and return to shooting swiftly.
Work through a simple diagnostic order: check batteries, confirm channel/group matching, swap components to isolate the fault and use a sync cable if wireless remains unreliable. Start by fitting fresh batteries in transmitter and receivers and verifying pairing indicators. Trigger each flash directly from the transmitter to identify whether the issue is with a receiver or the flash head. If misfires persist, change channels to avoid interference and, if needed, temporarily connect a PC sync cable to confirm the strobe and camera timing. An often-overlooked issue is a partially inserted hot shoe connection or a loose PC sync cable, which can cause intermittent firing. Always ensure connections are firm. This structured approach narrows the fault quickly and avoids unnecessary gear swaps during a session.
Following this flow keeps misfires from turning into longer stoppages and restores confidence in your lighting setup before client frames are taken.
Pick the least congested channel, position the transmitter centrally with a clear path to clustered receivers, and keep transmitters away from large metal surfaces or Wi‑Fi routers that can degrade RF strength. Orient receivers so antennas aren’t blocked by modifiers or stands; with multiple receivers, stagger placement to avoid antenna shadowing, especially with large softboxes or V-Flats. V-Flats are essential for controlling spill—understanding how to position them effectively will improve your trigger group strategies. Similarly, polyboards can be used for fill or flag light, and knowing how to integrate them ensures your trigger signals remain clear. Label channels/groups consistently and record any changes during the session so repeats are straightforward. In dense setups like a cyclorama, do a quick walk‑test from likely camera positions to confirm trigger reliability.
Applying channel management and thoughtful placement prevents intermittent dropouts and keeps multi‑flash control reliable across the studio floor.
Choosing a system comes down to balancing budget with the features you actually need: TTL, HSS, range, latency and ecosystem compatibility. If you rely on a particular flash ecosystem, such as `Nikon` or `Fuji`, prioritise triggers that support its TTL/HSS protocols to avoid surprises. Many studio shooters find a mid‑range RF system — solid range, dependable groups/channels and reliable manual control — covers most needs; larger commercial studios or those requiring tight TTL/HSS integration may opt for pro‑level ecosystems. We recommend testing candidate systems in studio time before you buy so you can validate latency, range and behaviour in real workflows. This guide focuses on studio-based triggering; outdoor work introduces additional variables like extreme range, direct sunlight, and environmental interference that require different considerations.
Use the short buyer comparison below to guide which class of trigger to test in the studio before purchasing.
This framework narrows your choices and reminds you to validate systems hands‑on before committing.
In 2025, look for mature RF ecosystems, solid build quality and proven group/channel management from brands like `Godox`. Ecosystem‑matched systems tend to offer the best TTL and HSS support, such as a `Godox trigger Sony` or `Godox trigger Canon`, while standalone RF units like the `Godox XPro` provide reliable manual control at lower cost. The `Godox XPro` and `X2T` transmitters are popular choices, offering robust manual control and often good TTL/HSS integration across various camera brands when paired with compatible receivers. The simplest way to decide is to test sample units, such as a `canon flash transmitter` or a `Godox trigger Nikon`, during booked studio time and compare latency, range and build under a full working setup. Prioritise systems that show consistent reliability when you change modifiers, reposition lights and run cyc shots.
Testing in a real studio remains the fastest way to confirm which system suits your production needs.
Your budget will limit which features you can buy: top‑end systems offer integrated TTL/HSS and very low latency, mid‑range units balance manual control with useful features, and budget options provide basic triggering for practice or limited setups. Compatibility is key — make sure the trigger supports your camera and flash brands (e.g., `Nikon`) for TTL and HSS, or plan to work manual if it doesn’t. We strongly recommend renting studio time to test candidate triggers in realistic conditions, comparing test‑fires across groups and modifier setups before you buy. That reduces the risk of investing in a system that doesn’t match your workflow.
Aim for practical testing and a clear feature priority list so your purchase supports your day‑to‑day work and client expectations.
FAQs
Unlock professional photography potential with our guide to wireless flash triggers. Learn remote strobe control techniques for flawless studio flash sync!

Prioritise compatibility with your camera and flash brands, essential features like TTL and HSS, effective range and latency, and your budget. Determine if advanced features are necessary for commercial work or if a simpler system suffices for personal projects. Hands-on testing in a studio environment offers the most reliable way to assess a system's suitability.
Optimise reliability by positioning the transmitter centrally with a clear path to receivers, avoiding large metal objects or Wi-Fi routers. Select the least congested channel, ensure fresh batteries, and conduct a walk-test from various camera positions to confirm consistent firing across the shooting area.
Begin by checking battery levels in both transmitter and receivers, then confirm all devices are on the same channel and group. Test each component individually to isolate faults. If misfires persist, try switching to a different channel or temporarily using a sync cable to verify camera and flash timing. Documenting your setup and any changes can significantly speed up troubleshooting.
Yes, RF triggers are highly effective outdoors due to their longer range and lack of line-of-sight requirements. However, be mindful of extreme distances, environmental obstacles, and potential interference. Always test your setup in the field before a shoot to ensure consistent performance.
TTL automates flash output via camera metering, accelerating initial setup. HSS enables shooting above the camera's native sync speed, allowing for shallow depth of field or blending flash with strong ambient light. Both features enhance adaptability, though many professionals use TTL for initial scouting and manual settings for consistent, repeatable final results.
Learn


.webp)
