Rembrandt lighting is a classic portrait approach that leaves a small, bright triangle beneath the eye on the shadowed side of the face to create sculpted form and cinematic depth. This guide explains what Rembrandt lighting is as a lighting technique, why it reads as dramatic on camera, and exactly how to reproduce it consistently in a studio using common modifiers, tools and camera settings. Many photographers struggle to make the triangle repeatable or to balance contrast without losing skin detail — here you’ll find precise light positions, simple troubleshooting checks and modifier recommendations to resolve those issues. You’ll also get clear setup steps, quick equipment reference tables and studio‑specific tips so you can practise these techniques in a hireable space.
Rembrandt lighting is one of the most classic portrait lighting techniques, marked by a small triangle of light on the cheek beneath the eye on the shadow side. It happens when a single dominant light sits to one side and slightly above the subject. The geometry between key light and face sculpts the shadow and highlight separation, emphasising bone structure and giving a moody, three‑dimensional look. Photographers use Rembrandt when they want weight and depth while keeping catchlight and highlight control to protect skin texture. Understanding how the triangle forms and how key, fill and reflectors work together is the first step to reliably creating dramatic studio portraits.
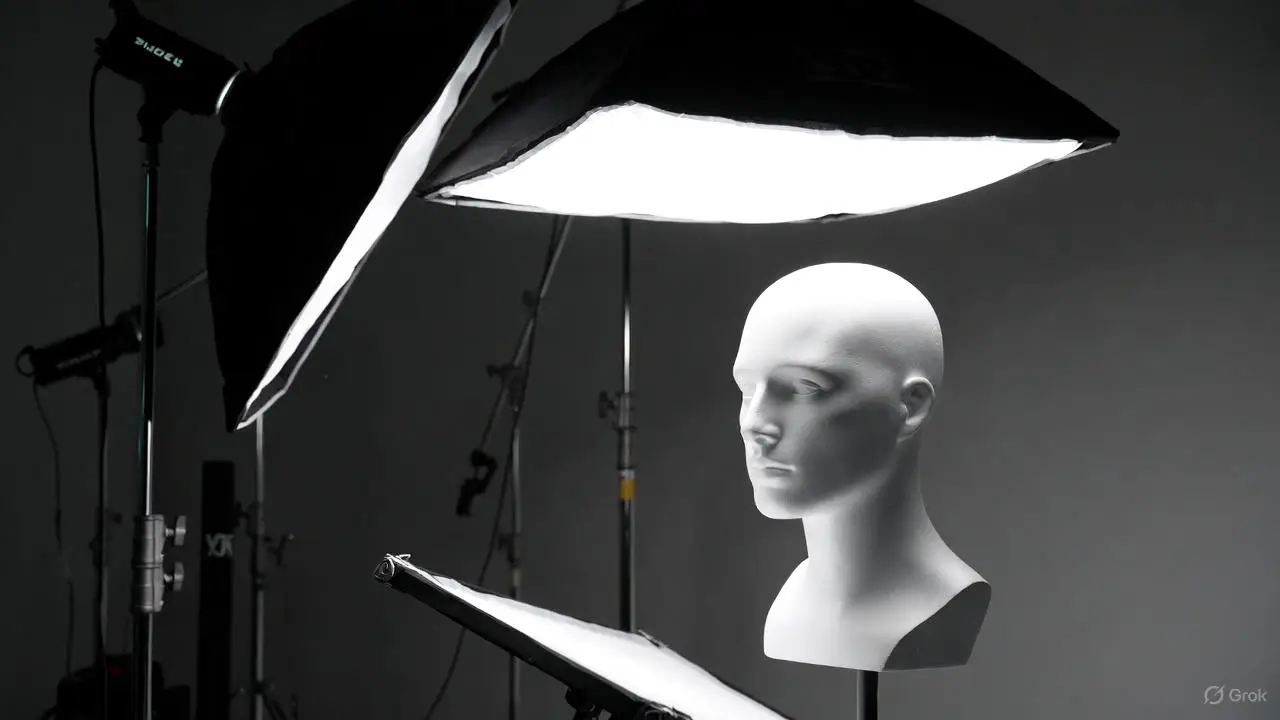
The Rembrandt triangle is the small patch of light that appears on the cheek under the eye on the shadow side when the nose just meets the shadow edge from the key. Aim for a triangle no wider than the eye and no longer than the nose to keep the classic feel — if it grows, the pattern starts to read as loop or short lighting instead. You can fine‑tune it by nudging the key a few centimetres horizontally or vertically and shooting test frames to watch the patch expand or contract. Thinking of the triangle geometrically makes setups easier to reproduce across different faces.
Interactive Rembrandt Lighting Design: Achieving the Signature Triangle
A Rembrandt patch is defined as a bright triangle framed by self‑ and cast‑shadows on a facial area. By analysing those shadow curves on a 3D face model, the method estimates candidate lighting directions from user‑specified patches and selects the best direction among them. In short, the approach helps users interactively design and achieve Rembrandt lighting without endless manual trial and error.
Interactive Rembrandt Lighting Design, 2005
Rembrandt lighting produces three reliable visual traits: clear modelling with directional shadow, a small illuminated triangle on the shadow cheek, and preserved highlight detail on the lit side so skin texture stays intact. Together these traits emphasise bone structure and give a cinematic, painterly mood that works for editorial, headshot and beauty work. Modifier softness, key distance and subtle fill choices are the main variables that change the result. Watching for these characteristics helps you decide when Rembrandt suits a subject and which tweaks will shape the mood you want.
Build Rembrandt by placing a dominant key light to the side and slightly above your subject, and by controlling fill so the shadow side keeps depth without losing detail. Start with the subject turned three‑quarters to the camera, position the key at roughly 45° off axis and a touch above eye level, then test until the nose casts the triangle. Metering and camera settings matter: expose to protect highlights and keep deep shadows from clipping to black. Small, deliberate moves are the fastest path to consistency — the step‑by‑step list below gives a straightforward studio workflow.
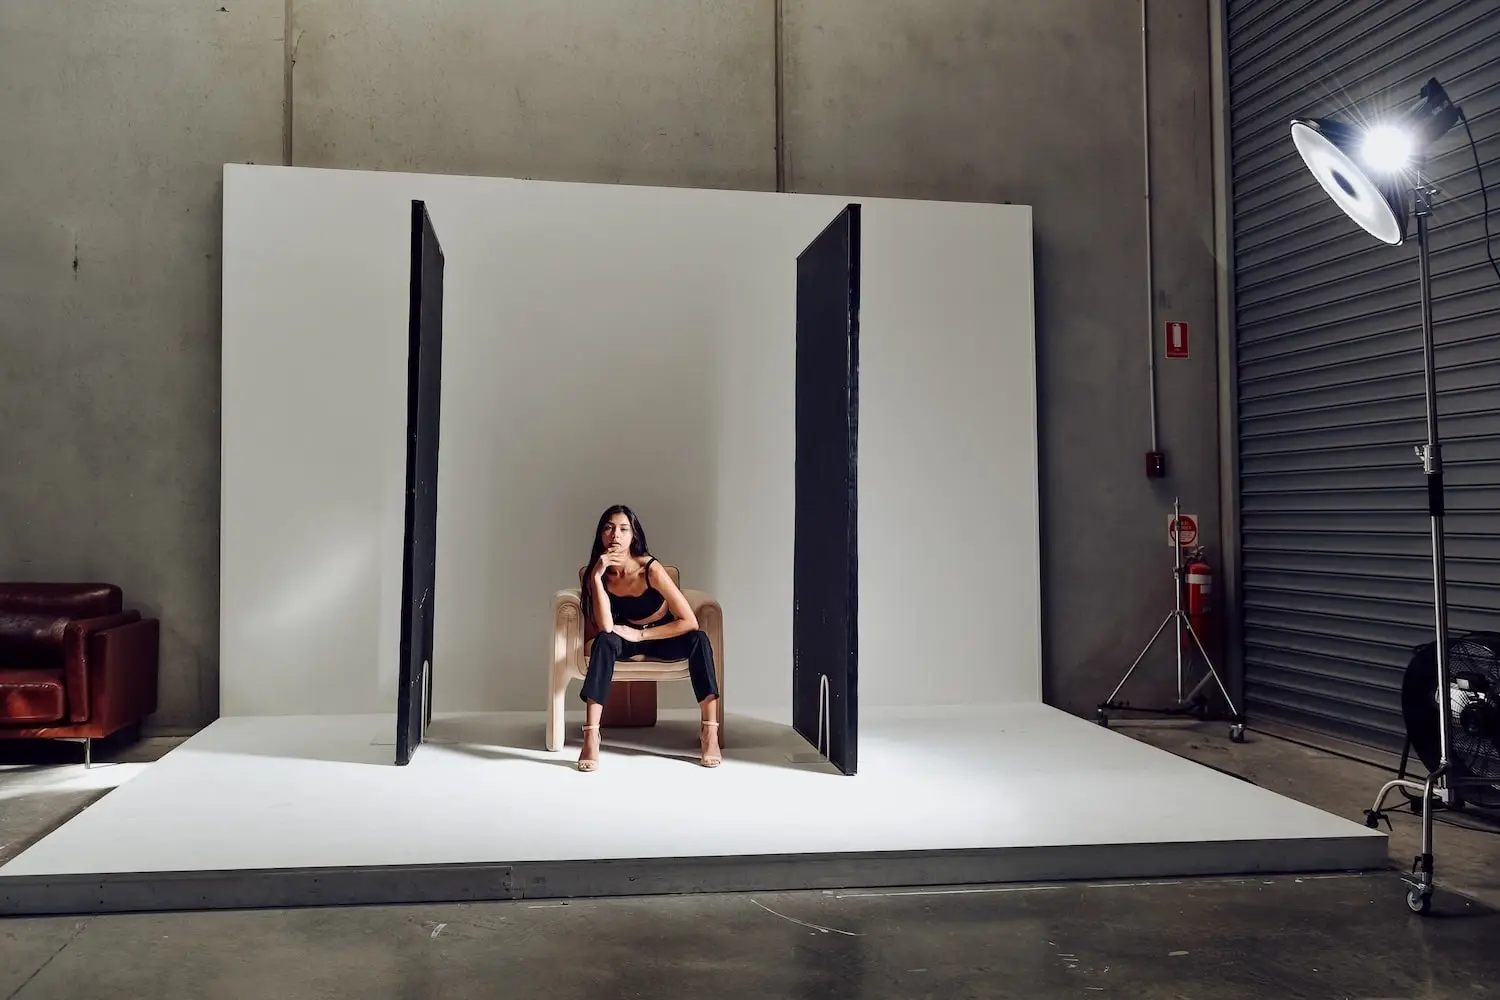
Start each session by checking an uncompressed or RAW exposure so highlights stay in range; the next section covers exact key angles and quick troubleshooting. If you want to practise this setup in a hireable space, Bohemia Bay Studio has the kit and blackout control to make results reliable.
Begin with the key roughly 45° from the camera‑subject axis and slightly above eye level — that downward angle sculpts the cheekbones and casts the nose shadow that forms the triangle. Small vertical moves (a few centimetres) change the triangle’s height; horizontal moves change its width. Moving the light closer widens the triangle; raising it shortens the triangle vertically. Grids or snoots tighten spill and increase contrast; a large softbox softens shadow edges and smooths the triangle’s gradation. Use a handheld meter or quick test shots to balance power, distance and angle for the look you want.
Fill and reflectors let you control shadow depth without erasing the triangle that defines Rembrandt. A silver reflector gives stronger, crisper fill suited to fashion and beauty; a white reflector provides softer lift for natural portraits. Low‑power fill strobes are typically set one to two stops below the key to gently reduce contrast. Position reflectors near the camera axis under the chin or at 30–45° to bounce shadow detail back. Choose the combination that preserves modelling while keeping skin texture intact, then fine‑tune intensity by distance and angle.
A compact kit will get you consistent Rembrandt: a powerful strobe or continuous key, a directional modifier (a medium softbox or beauty dish with optional grid), sturdy stands and a white or silver reflector for fill control. Useful extras include grids to limit spill, snoots for accents and gels for colour contrast. Modifier size and distance shape shadow edges and midtones, so consider both power and physical footprint when picking gear.
The table below compares common studio gear and how each item influences the Rembrandt look.
This table shows how modifier and tool choices alter the visual outcome and helps you decide what to request when booking. If you want a fully equipped space, Bohemia Bay Studio offers professional lighting for hire, with self-access and instant online booking to keep practice flexible.
Softboxes increase the apparent size of the light source, smoothing shadow edges; smaller modifiers like beauty dishes sharpen texture and tighten shadow boundaries. Reflectors lift the shadow side’s tonal range without adding power — silver for stronger, cooler bounce and white for softer, warmer lift. Reliable, adjustable stands and booms let you lock positions so the triangle is repeatable across subjects and sessions. Picking the right softbox size, reflector surface and stand setup is crucial to a consistent Rembrandt result.
Typical errors are: a key placed at the wrong angle that flattens the face, too much fill that removes modelling, and using the wrong modifier size so shadows are either too hard or too soft. The fix usually starts with a test exposure and a simple tweak — reduce fill, move the key a few degrees, or switch to a larger modifier. Use metering and histogram checks to avoid highlight clipping; if highlights are blown, lower key power or increase shutter speed while keeping aperture for depth of field. The quick problem→fix list below gives actions you can try between test frames.
Apply these fixes iteratively during a session to build consistent results; the next section outlines diagnostic checks and how to decide between keeping deep shadows or adding fill.
To prevent flattening, start with the key slightly above eye level and check cheek falloff with a remote test frame, making small horizontal adjustments until the triangle appears. Use a mirror or tethered preview to see how nose shadow and cheek highlight interact, and use a handheld meter where available to keep highlights below clipping. If the face looks flat, raise the key 5–10° or move it laterally to increase contrast; if highlights clip, lower key power or tweak camera exposure. Consistent measurement and small changes are the quickest route to repeatable Rembrandt placement.
Use stronger fill for beauty and commercial work where skin detail must be visible; keep fill light minimal for editorial or moody portraits that benefit from deeper shadow. A good rule is one to two stops below the key for controlled lift. Reflectors give a softer, natural lift while a low‑power secondary strobe offers precise, repeatable control. Place reflectors close to the shadow side at 30–45° for gentle lift and move them incrementally to keep the triangle while lowering contrast. Choose the fill approach to suit the genre and the subject’s skin tone — then test and adapt.
After you can reproduce classic Rembrandt reliably, experiment with modifier hardness, relative positions and adding accent lights to create hard‑vs‑soft or broad‑vs‑short variations. Hard light increases contrast and reveals skin texture for gritty editorial work; soft light smooths skin for beauty and reduces midtone contrast. Switch between broad and short lighting by rotating the subject or moving the key across the axis while keeping height consistent to preserve triangle geometry. The table below compares primary variation attributes so you can pick the right approach for your creative goal.
Intro to variations table: Use this comparison to see how modifier choice and placement shift shadow edge and mood, helping you select the right variation for each subject and genre.
Summary: By varying modifier hardness and subject orientation you can translate Rembrandt into editorial, beauty or cinematic styles.
Hard light creates sharp shadow edges and strong micro‑contrast that emphasise texture and pores — ideal for edgy editorial or character portraits. Soft light gives gentle falloff and smoother transitions that flatter skin and reduce visible blemishes, making it better for beauty and client headshots. Use a small modifier or grid for hard light and a larger softbox or diffuser for soft light; control distance to fine‑tune shadow crispness. Trying both on the same subject quickly shows how modifier choices change the emotional tone of the final image.
Broad lighting illuminates the side of the face turned toward the camera, creating a fuller, more open look while still allowing a triangular highlight if positioned carefully. Short lighting illuminates the far side, increasing shadow on the near side and producing a more dramatic, sculpted look that pairs well with Rembrandt. Switch between broad and short by rotating the subject or moving the key across the axis while keeping height steady to maintain triangle geometry — a handy way to adapt Rembrandt to different faces and goals.
Book a session at our Cheltenham studio. Self‑access starts at $109/hr, all lighting and modifiers included. Flexibook lets you reschedule up to one hour before if plans change.
Book Studio Time View Equipment
"Beautiful, clean and modern space with everything you could need." — Simone Shiers, Photographer
Intro to the final practical tools table: The compact reference below maps each step to the primary tool or modifier you’ll use so you can replicate the workflow quickly during a session.
Summary: Use this step‑to‑tool mapping as a quick studio checklist so each adjustment produces a predictable visual change.
FAQs
Enhance your photography skills by mastering Rembrandt lighting techniques. Create stunning portraits with dramatic studio lighting for breathtaking results.

Rembrandt lighting adds depth and dimension by using shadows and highlights to emphasise facial structure. It’s great for conveying mood and emotion, which is why photographers use it for editorial, beauty and headshot work. The controlled contrast also preserves skin texture where it matters, keeping images striking but detailed.
Common problems are wrong key angles, too much fill and incorrect modifier size. Start by checking the key’s height (slightly above eye level) and make small horizontal or vertical tweaks if the triangle is the wrong size. Reduce fill if the triangle disappears. Use test shots and quick meter or histogram checks to guide adjustments.
Medium softboxes and beauty dishes are reliable. A medium softbox gives soft, gradual falloff and smooth shadow edges; a beauty dish is more directional and increases texture and contrast. Grids help narrow the beam and boost contrast when you want sharper shadows. Pick the modifier to match the mood and the subject.
Yes. Natural light can produce Rembrandt, especially during golden hour or beside a single large window. Place your subject with the light at roughly 45° and use reflectors to bounce light into the shadow side to form the triangle. Natural light needs more adjustment, but it can look beautiful and organic.
Once you’ve nailed classic Rembrandt, experiment with modifier hardness, key distance and accent lights. Changing key distance will soften or harden shadows, shifting the angle can emphasise different features, and adding coloured gels or rim lights introduces creative contrast. These variations let you adapt Rembrandt for editorial, beauty or cinematic looks.
Learn


.webp)
