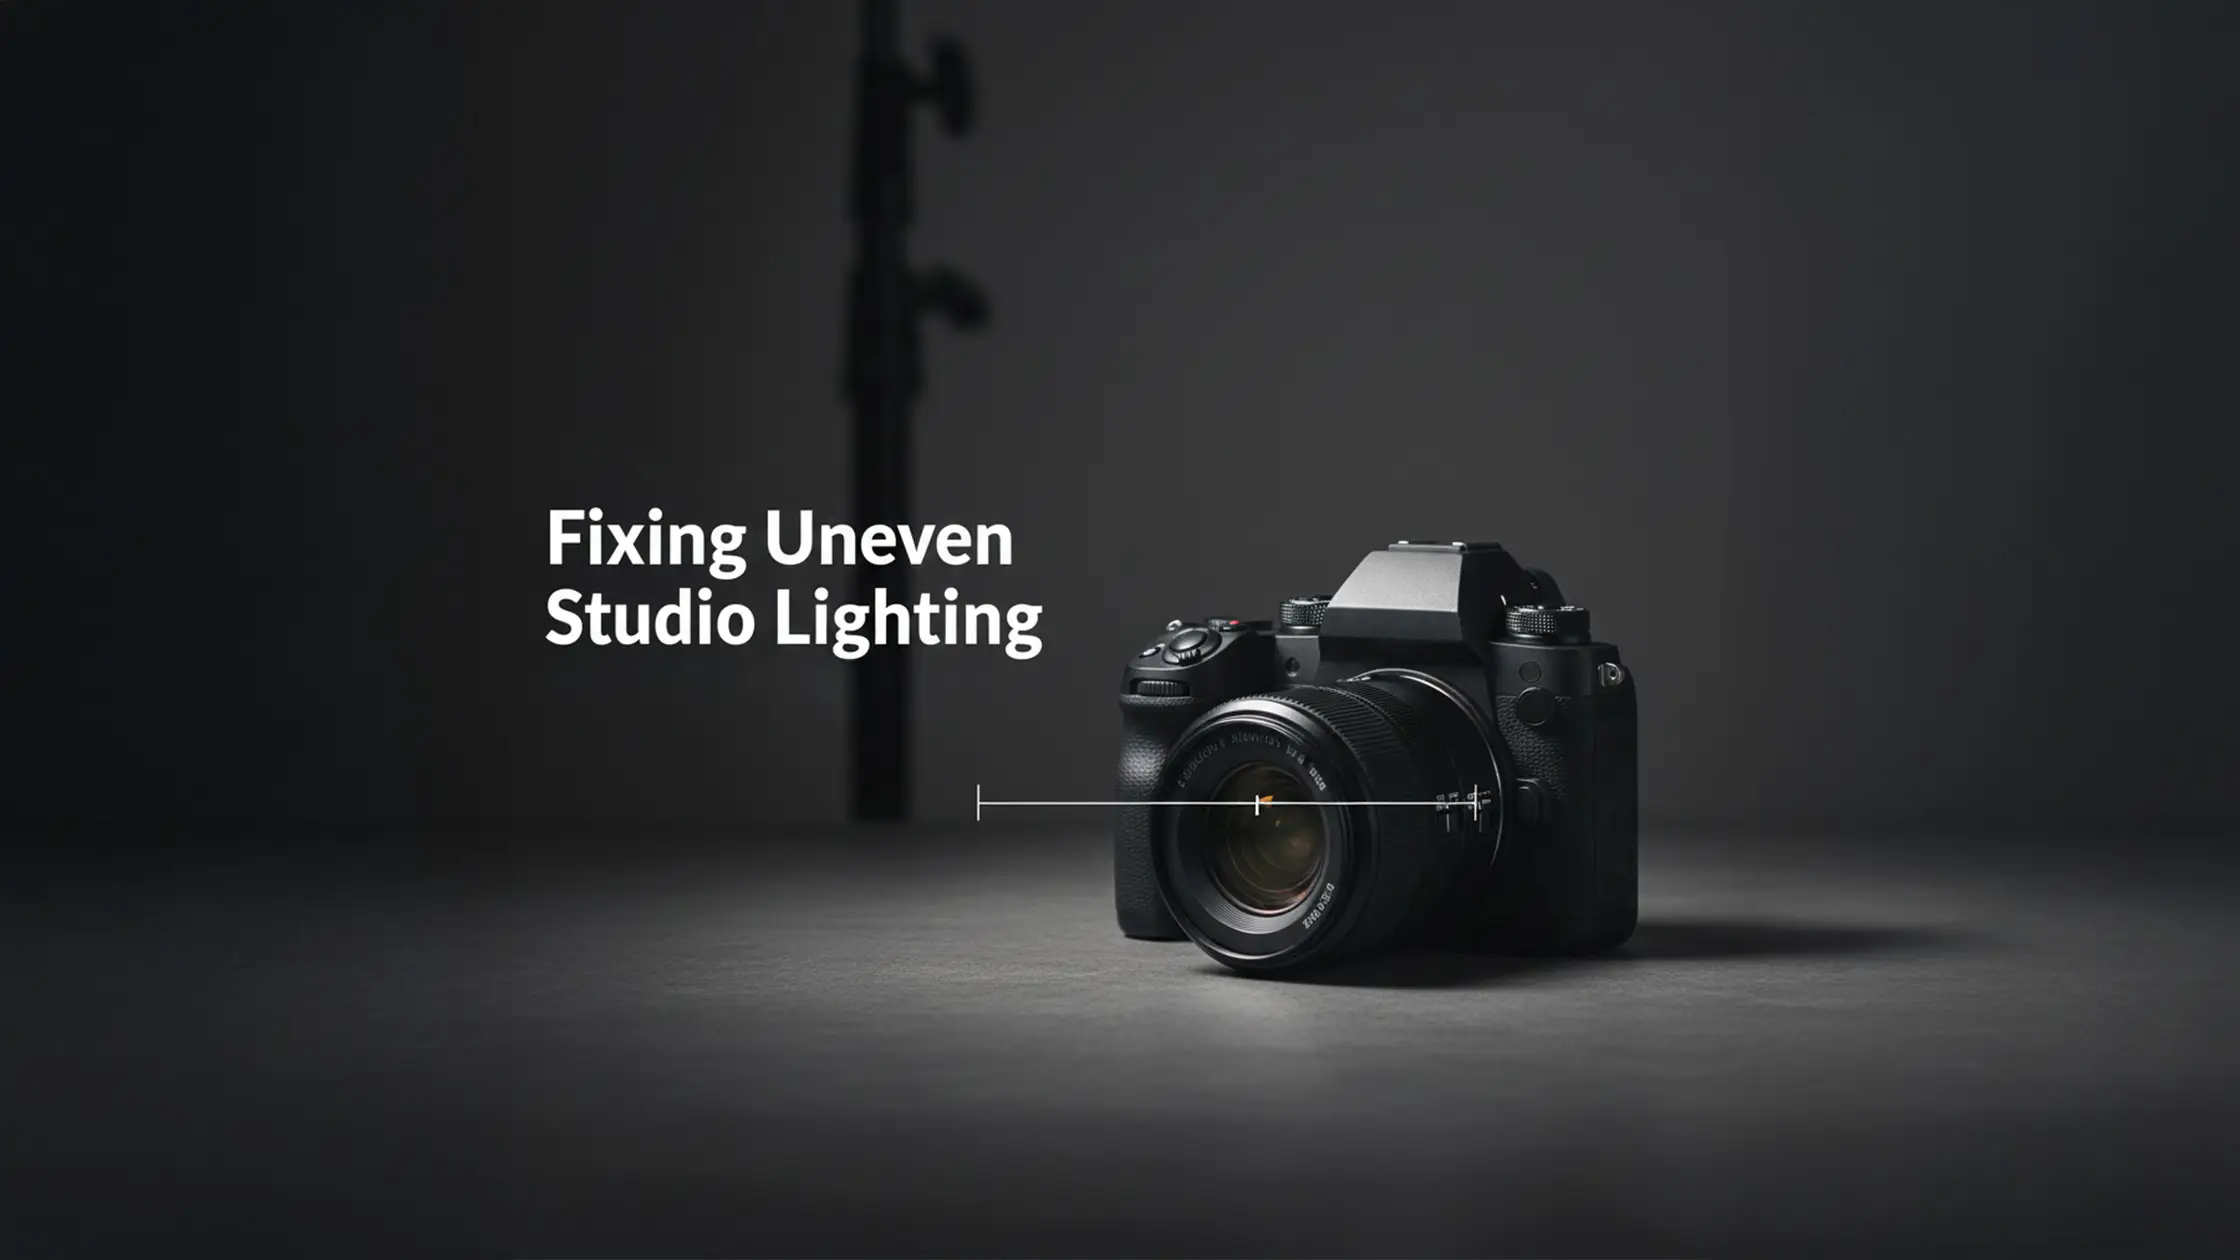
Reflectors and diffusers are the simplest, most flexible tools in the studio kit — quiet, reliable helpers that let you shape tone, contrast and mood without swapping your key light. Reflectors bounce existing light (from a strobe or window) to lift shadows and add catchlights; diffusers spread light to soften shadows and tame harsh speculars. Used together, they control shadow depth, highlight behaviour and skin texture for portraits, while preserving surface detail for product work. This guide breaks down what each tool does, compares common options, walks through practical setups for shaping fill and shadow, and links the techniques to everyday studio workflows. You’ll also find notes for practising these approaches in a pro studio and clear steps to book hands‑on time. Keywords like fill light techniques and reflectors are woven throughout so you can take the advice straight to the set.
Reflectors are surfaces that bounce available light back into shadow areas or create catchlights; diffusers are translucent materials that scatter light to reduce contrast and soften edges. Reflectors work by controlled bounce — the surface finish and angle determine warmth and punch — whereas diffusers increase the apparent source size, which softens shadow hardness. Each modifier has a distinct role: reflectors return directional fill and highlights; diffusers smooth texture and reduce harsh speculars. Knowing the difference — bounce versus scatter — makes it easier to choose the right tool for portraits, product shots or fashion work. For a gentle introduction to studio lighting fundamentals, see our essential tips for beginners.
They’re complementary: use a diffuser to calm a harsh key, then a reflector to return just enough fill to hold form and preserve catchlights. The sections that follow explain how each tool alters light and give practical cues for choosing between them.
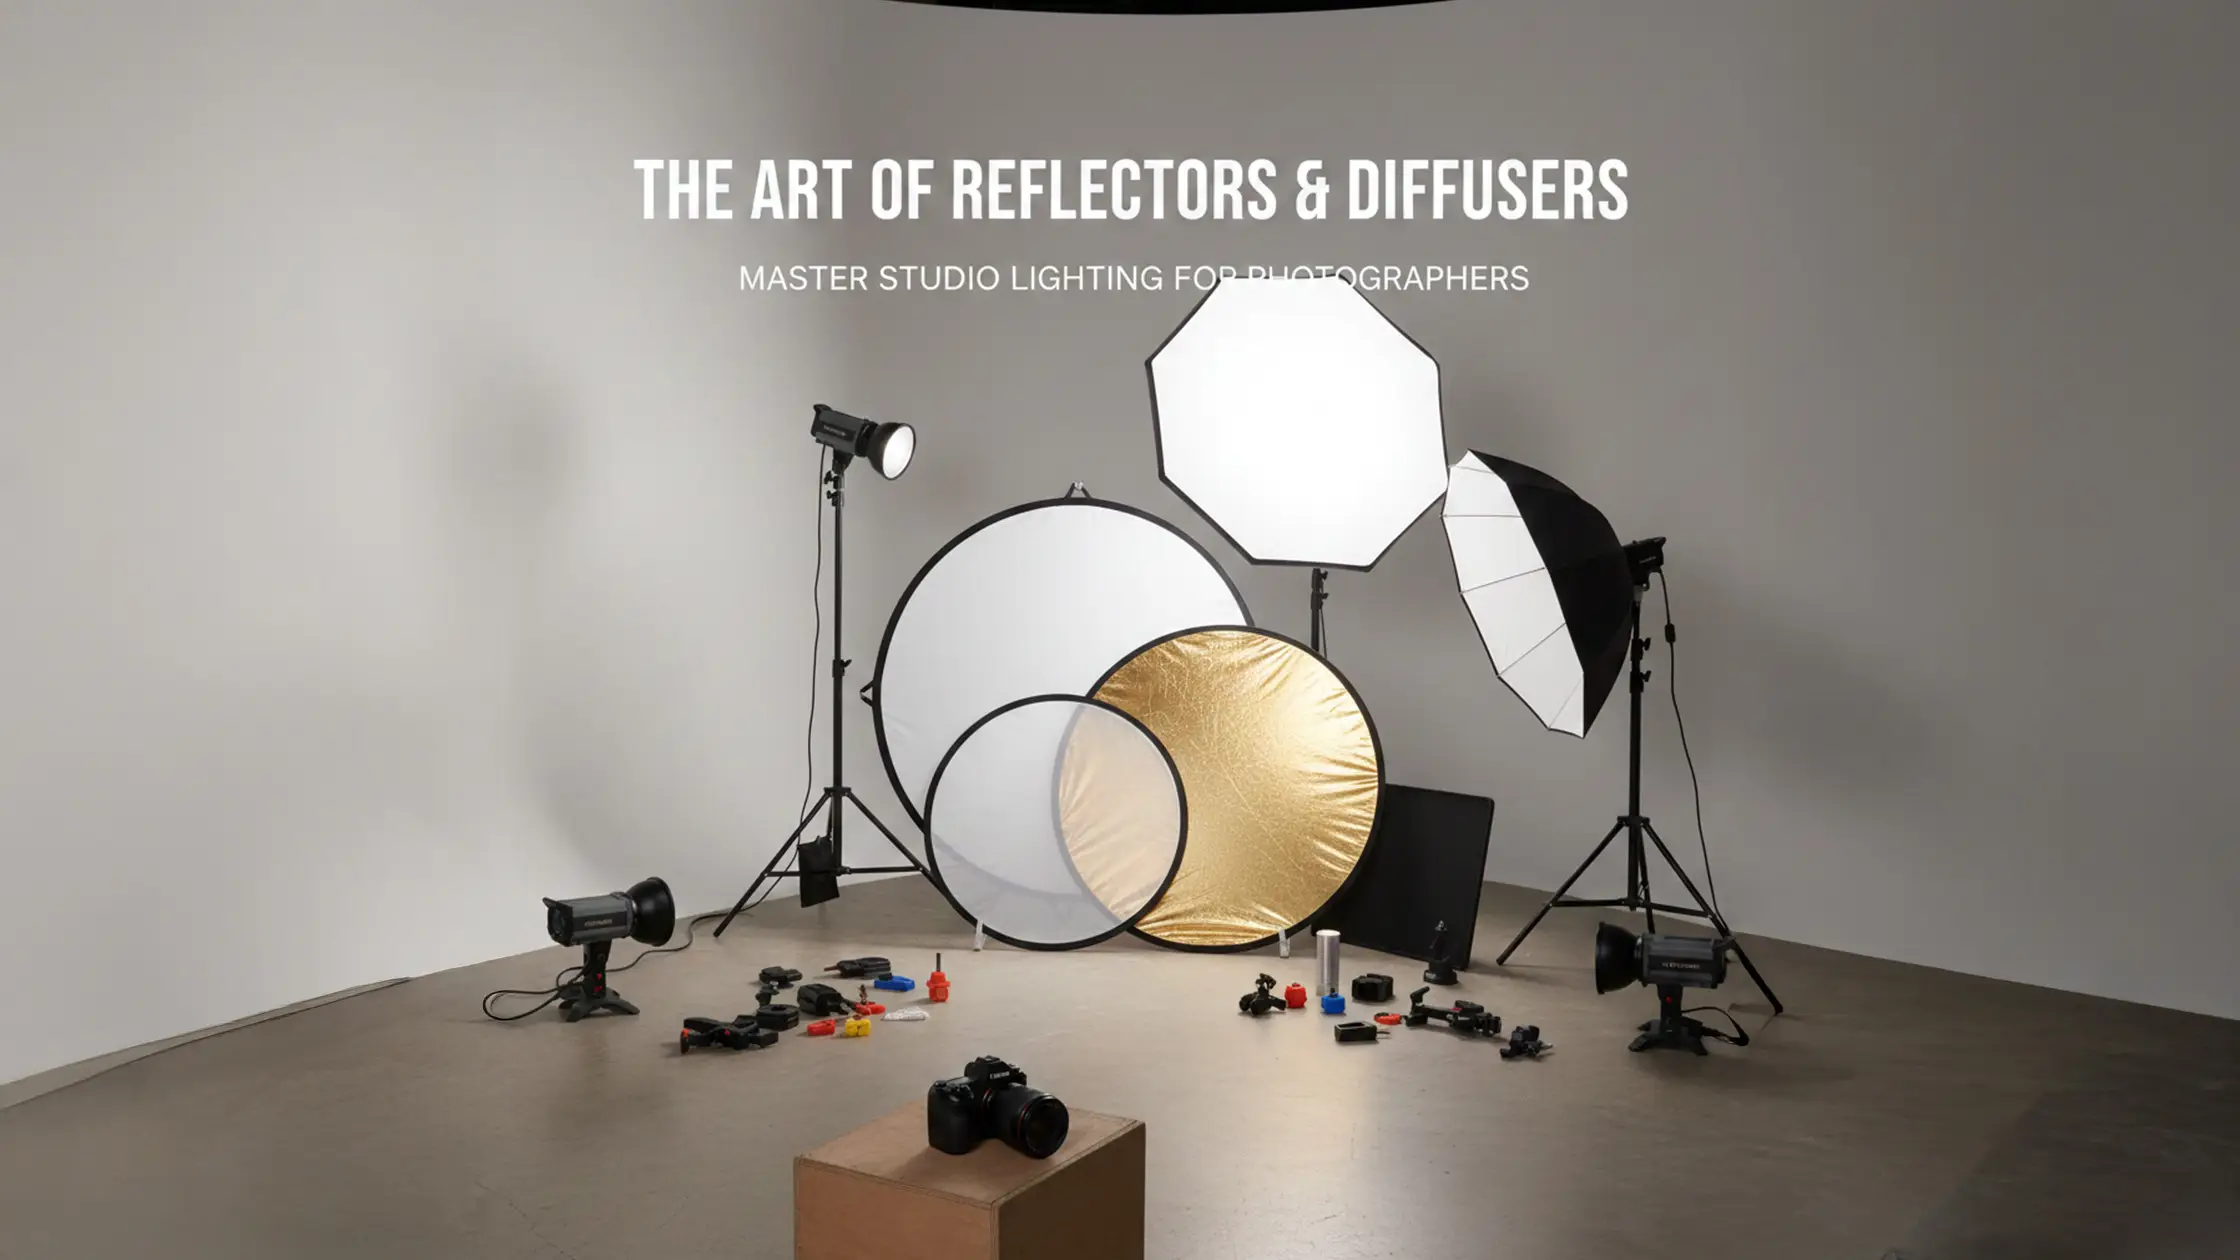
A reflector is any surface — fabric, foil or rigid board — that redirects light toward your subject to lift shadows and create catchlights. Popular multi‑surface 5 in 1 reflectors let you swap looks quickly. Surface finish and colour set the character: silver pushes contrast and specular highlights, gold adds warmth, white gives neutral soft fill, and black acts as negative fill by absorbing light. Distance and angle relative to the key and subject control intensity and falloff — move the reflector nearer for stronger, quicker fill but expect subtler modelling to vanish. Typical uses: silver for punchy fashion looks, white for natural headshot fill, gold for warm beauty tones. Clamshell setups (using a portrait or headshot reflector) are a favourite for flattering facial light. For more on rigid panels, see our guide to polyboards.
Once you can read how reflectors bounce light, the way diffusion changes apparent source size and shadow character becomes clearer — covered next.
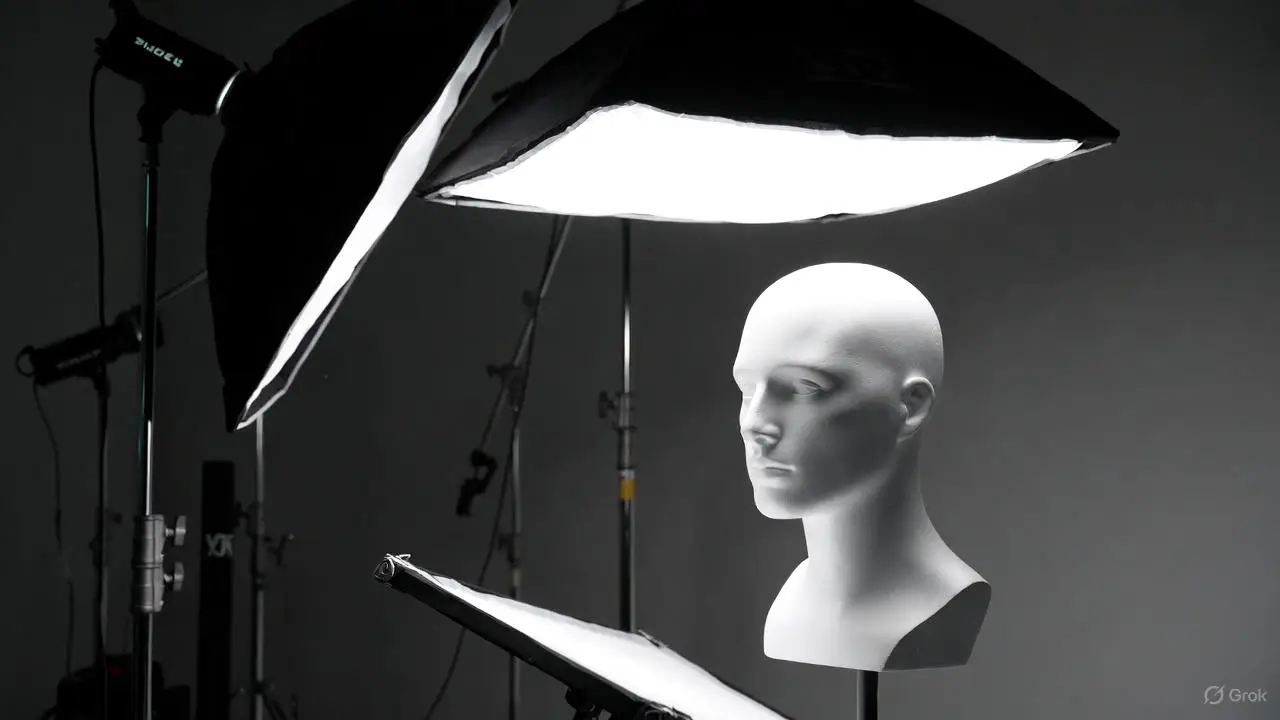
Diffusers scatter photons through a translucent surface, increasing the apparent source size and lowering directional intensity — the result is softer shadows and smoother skin. Common formats are softboxes, umbrella diffusers (including flash umbrellas) and scrims; each controls spread and falloff differently. Larger diffusers give softer transitions and gentler falloff; smaller ones retain more structure. Placement matters: move a diffuser closer to increase softness and reduce contrast; layer diffusion for progressively softer results. Choosing the right diffuser is about balancing softness with the control needed for beauty retouching or detailed product work. On a cyclorama, for example, an overhead scrim can deliver remarkably even, soft light across subject and background, cutting post‑production work.
With diffusion mechanics clear, the next section helps you match specific diffuser types to shoot genres.
Pick reflectors and diffusers based on the contrast, warmth and control you need. Reflectors come in silver, gold, white, black and translucent options — each changes tone and contrast. Diffusers range from compact flash umbrellas to large softboxes and scrims — shape and size determine edge quality and shadow gradients. When choosing modifiers, think about what you’re lighting (skin, fabric, glossy surfaces), the lighting ratio you want, and how much control over specular highlights is required.
Below is a quick comparison of common modifiers and sensible use cases.
Different reflectors and diffusers produce predictable visual outcomes — use that predictability to pick the right tool for your shoot.
Reflectors differ by surface and purpose, which shapes contrast and colour. Silver returns a strong, specular bounce for crisp highlights; gold adds a warm tone for beauty work; white provides a soft, neutral fill ideal for headshots, often via a dedicated portrait reflector. Black works as negative fill to deepen shadows and carve features; translucent panels (found on many 5 in 1 reflectors) act like a light diffuser when placed between light and subject. Choose a reflector by considering subject reflectivity, wardrobe and the mood you want. Clamshell setups remain a popular, flattering choice for portraiture. For multi‑light configurations and clamshell techniques, see clamshell lighting techniques.
Next we compare diffuser formats and explain how their shapes affect light quality in studio shoots.
Diffuser shapes change shadow edge quality and falloff, which affects texture and contrast. Softboxes deliver directional soft light with controlled spill — excellent for beauty and product shots that need tidy highlights. Umbrellas (including flash umbrellas) give broad, wrapping light suited to relaxed portraits. Scrims and translucent panels work with strobes or continuous sources for even coverage across groups or sweep backgrounds. Size and distance are crucial: larger diffusers close to the subject give the softest light; smaller or more distant diffusers retain more texture and modelling. For fashion lookbooks, a large octabox close to the model often yields a soft, flattering key that still defines form.
With those differences in mind, you can combine reflectors and diffusers into practical fill‑light techniques — covered next.
Fill light balances the key to hold form without flattening the subject. Reflectors provide directional fill; diffusers reshape the key to lower contrast. Control comes from positioning, angle and lighting ratio — common portrait ratios are 2:1 or 3:1 for a natural feel, higher ratios for drama. Typical setups pair a softened key (softbox or scrim) with a white or silver reflector for gentle or punchy fill, and a black panel for selective negative fill. With strobes, meter and test exposures to nail ratios; tweak reflector distance or add diffusion layers to fine‑tune shadow depth. In practice, precise ratios are usually achieved by small, iterative adjustments to modifier distance and power rather than a single meter reading.
Here are practical setup notes and a compact configuration table to guide positioning and starting settings for common techniques.
These configurations act as a cheat‑sheet for controlling fill and shadow balance on set, and lead into step‑by‑step reflector techniques below.
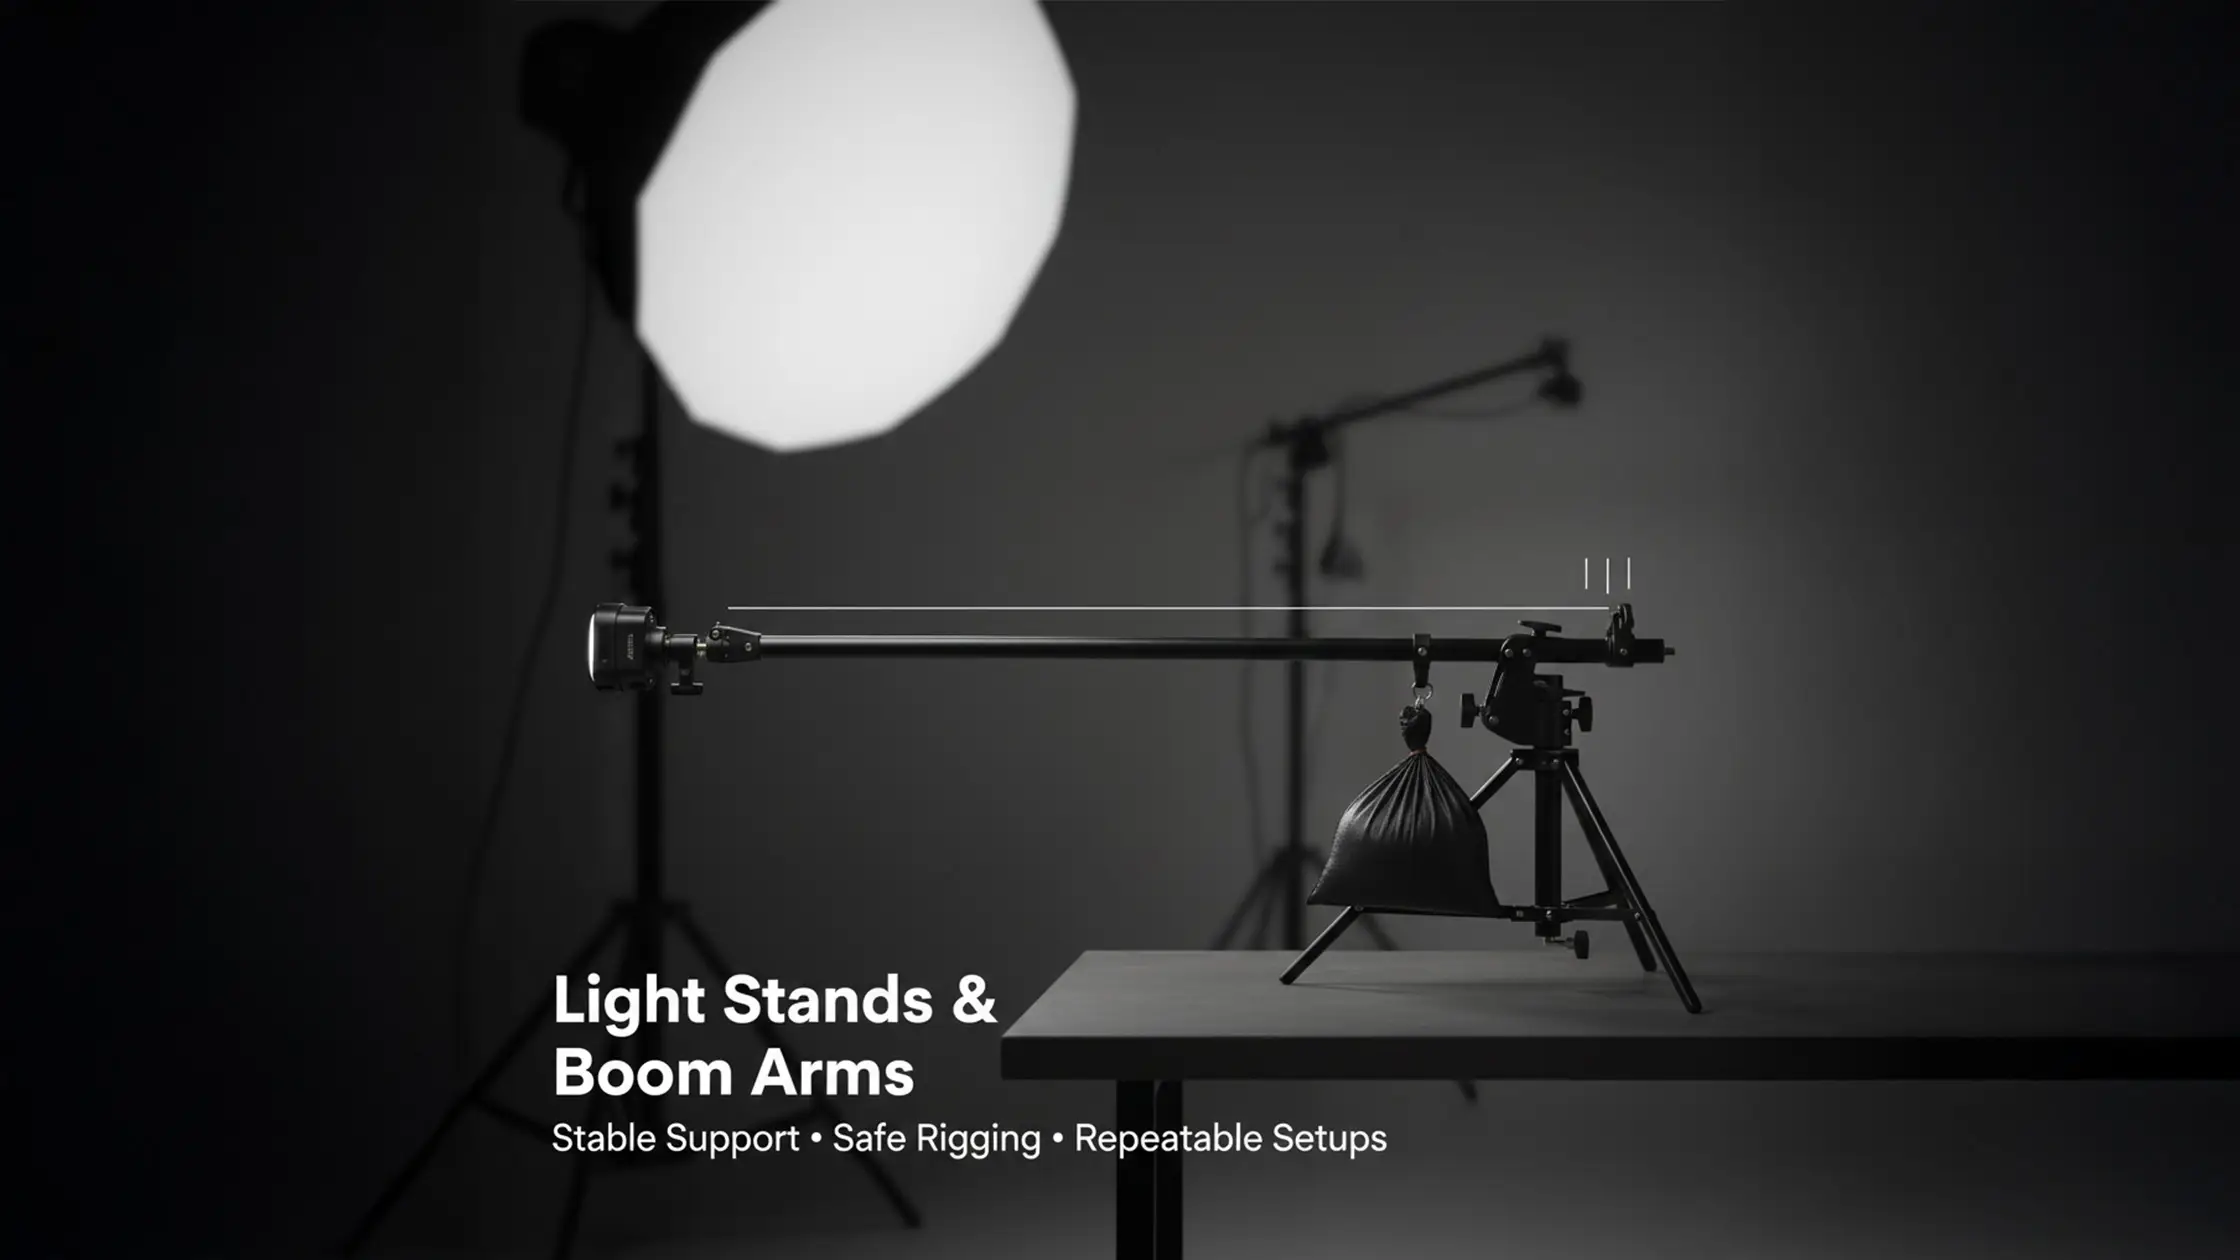
Common reflector techniques include bounce fill, wrap fill and selective specular returns — chosen by surface and angle. For a bounce fill, place a white portrait or headshot reflector opposite the key at roughly chin‑to‑shoulder height and angle it toward the shadow to lift values by about one to two stops; move it closer for stronger fill. For tighter catchlights or punchier returns, position a silver reflector near the camera axis. Use negative fill (a black card) on the shadow side to subtract bounced light when you want deeper modelling. A photography reflector stand helps keep height and angle consistent. For panel techniques and light control, see our guide to V‑Flats.
After you’ve placed reflectors, use diffuser tactics to soften the key without losing structure — covered next.
Diffusers reduce contrast by enlarging the effective source relative to the subject, producing gentler transitions between highlights and shadows and smoothing skin. A softbox close to the subject with a shallow angle gives controlled wrap ideal for beauty work; a large scrim between strobe and subject spreads light for even product shots on a cyclorama. Layer diffusion or add a grid on the key to keep directionality while preserving softness. Pair diffusion with subtle reflector fill to maintain modelling and avoid a flat look. When using high‑speed sync (HSS) on strobes, remember HSS works by pulsing the flash rapidly, which effectively behaves like a brief continuous source and usually reduces available power — compensate with larger diffusers or closer placement to maintain softness and output.
With these techniques you can assemble complete setups for portraits, product and fashion by choosing the right modifiers and placements.
Once you’ve practised these fill‑light and shadow control methods, a professional studio speeds iteration and refinement.
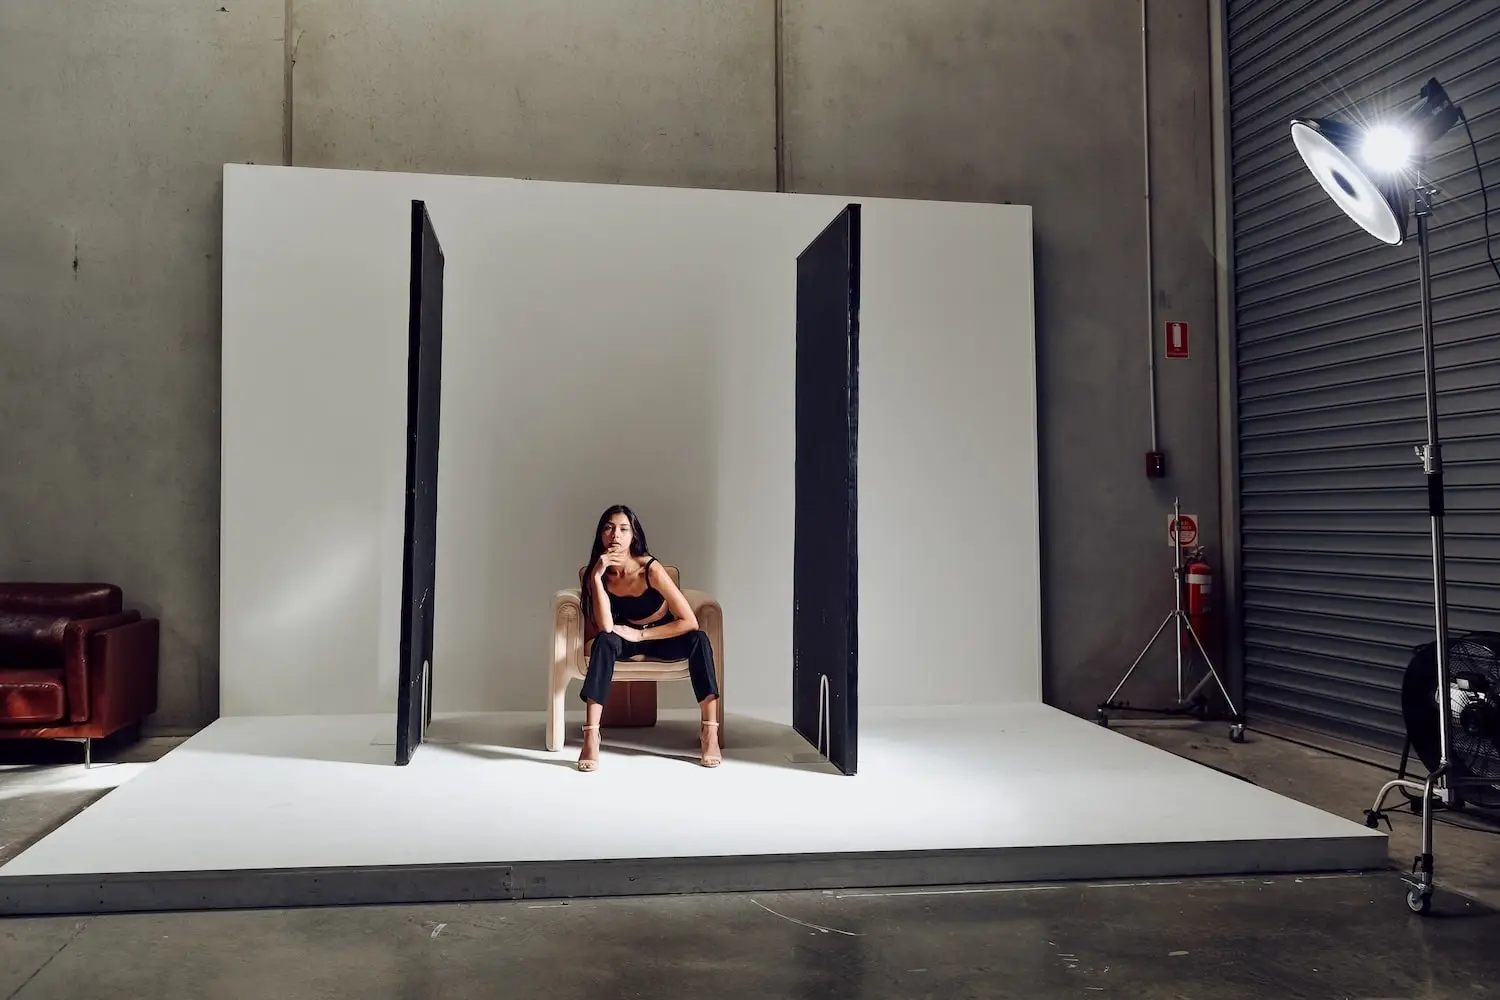
Dependable studio setups combine a softened key, thoughtful reflector placement and controlled background lighting to get consistent results across portraits, fashion and product work. For portraits, start with a large softbox as the key, a white portrait reflector for fill and an optional hair light for separation. For product on a cyclorama, rig a large scrim for even wrap and use small reflectors to shape specular highlights. Fashion often benefits from directional diffusion paired with silver bounce to retain texture while adding punch, typically with a strobe as the main source. Watch lighting ratios, subject‑to‑modifier distance and background falloff to keep outcomes repeatable. For a classic portrait structure, see our Rembrandt lighting techniques.
Use the practical setups and checklist below as adaptable starting points for your gear and genre.
This checklist gives a reliable portrait structure to iterate from; the next section unpacks step‑by‑step placement and camera settings.
A three‑point variant — soft key, reflector fill and hair light — delivers flattering depth with controllable contrast. Place the softbox about 1–1.5 metres from the subject at a 30–45° angle above eye level to shape cheekbones and nose shadows; set the white portrait or headshot reflector opposite the key to lift shadow detail by roughly one stop. Add a small back or hair light behind the subject to separate hair and shoulders from the backdrop, keeping its power low to avoid spill. For initial tests use base ISO, a moderate aperture (f/4–f/8) and a shutter speed synced to your strobe for clean exposures. TTL metering is convenient but can vary with complex scenes or reflective surfaces — for critical work, manual power adjustments or a light meter give more repeatable results.
Product and fashion work demand tight control of reflections, specular highlights and consistent colour across frames. For glossy objects use diffuse wrap from large scrims and control specular points with small flags or cards. For textiles, combine directional softboxes with silver bounce to keep fabric texture while smoothing skin. Always set white balance from a neutral target and check highlight retention in RAW to avoid surprises in post. A short pre‑shoot checklist — test shots, histogram checks and small power tweaks — prevents inconsistent highlights that break continuity across a series. In product work on a white cyclorama, slightly overexposing the background compared to the product helps create a seamless, floating look without harsh shadows.
These practical setups make it straightforward to map techniques to an actual studio session for refinement.
A professional studio gives a fully equipped, self‑access workspace ideal for practising reflector and diffuser techniques. With access (often 7am–midnight via an instant access code) you can test softbox and scrim configurations, set up bounce‑fill placements on a reflector stand and use a white cyclorama for seamless product work. If you want to rehearse lighting ratios, nail catchlight placement or run controlled product passes, the studio reduces setup friction and lets you iterate efficiently. Professional lighting kit is typically included, giving a consistent platform to develop repeatable lighting recipes for clients.
Book a session, bring preferred modifiers (like 5 in 1 units or a clamshell reflector) and use the space to turn theory into repeatable results.
A well‑equipped studio supports advanced lighting practice: pro strobe heads, a range of modifiers and a white cyclorama let you work through softbox and scrim workflows in a controlled environment. The kit is ideal for beauty and product shoots where repeatable, consistent light matters. The self‑access model lets you iterate through setups, refine reflector placement and experiment with diffusers without waiting for an attendant. From experience, when using wireless triggers like the Godox XPro or X2T, channel selection can be more important than you think — nearby Wi‑Fi may cause intermittent misfires, so test channels for reliable performance.
With this equipment available, booking is a simple step away so you can reserve time and apply the lighting techniques in‑studio.
Booking is straightforward: choose a time slot, confirm your booking and you’ll receive an instant access code for self‑entry so you can start setting up immediately. Before you arrive, prepare a short shot list, bring any specialised reflectors or diffusers you prefer (like a clamshell reflector or 5 in 1 units) and check power or adapter needs. Allow time for setup, test exposures and adjustments — the self‑access model is ideal for efficient repetition and creative exploration.
Use this simple workflow to turn the techniques above into productive studio practice.
Common mistakes include misjudging reflector distance or angle and introducing colour contamination from nearby surfaces — these create uneven fill, blown highlights or unwanted casts. Diffuser errors include placing the panel too far (losing softness) or too close without reducing power (risking overexposure); uneven diffusion can produce hotspots or patchy falloff. Fast diagnostics — meter shadow and highlight areas, toggle reflectors in and out and review test shots — will quickly isolate problems. Fixes are usually simple: move reflectors in small increments, switch to neutral white surfaces to remove colour spill, or reduce key power when adding diffusion layers. This guide focuses on studio triggering; outdoor shoots introduce extra variables we don’t cover here.
Address these issues quickly to restore control and protect image quality. The following subsections list specific placement mistakes and diffuser checks.
Typical errors include setting a reflector at the wrong height (creating unnatural catchlights) or too close (flattening the subject and losing modelling). Wrong angles can pick up colour spill from surroundings, so always scan for environmental reflections and use neutral cards when needed. To reduce intensity, move the reflector slightly farther away or switch to a white surface for softer return. A quick test shot with and without the reflector shows its effect and guides fine repositioning. A reflector stand helps keep height and angle consistent. In practice, subtle colour shifts from a nearby wall can show up in a silver reflector, so be mindful of your surroundings.
These fixes lead naturally into the diffuser checks below that keep softening even while preserving contrast.
Diffuser issues often appear as loss of contrast, hotspots or colour shifts when diffusion interacts with the source or surrounding flags. To avoid them, test diffusion at incremental distances and watch histograms for clipped highlights; reposition the diffuser or add a subtle fill to restore modelling. If diffusion looks uneven, check the fabric for wrinkles or tension problems and re‑tension or replace the panel for uniform scatter. If the light becomes too soft, reduce diffuser size or increase your key‑to‑fill ratio to retain sculpting. Sometimes extreme softness will inherently reduce contrast — deciding whether to accept that compromise or change modifiers is often an artistic choice rather than a strict technical rule.
Understanding these trade‑offs helps you decide when to accept small compromises and when to swap tools to reach your intended look.
To practise these troubleshooting steps hands‑on, consider booking studio time in a controlled environment where you can iterate quickly and refine your approach.
Double Reflective Diffuser for Enhanced Lighting
This study proposed a double‑reflective diffuser and compared its performance to a conventional diffuser using the Radiance light‑environment analysis system. The research shows how a second reflective surface can improve light distribution in daylight ducts — a useful technical reference for understanding how layered or reflective diffusion affects uniformity and comfort in a controlled environment.
Development of Double Reflective Diffuser for Improved Lighting Performance of Light Duct, 2018
FAQs
Master fill light techniques to elevate your photography. Learn how to use reflectors and diffusers for stunning, well-lit images that stand out.

Reflectors and diffusers give precise control over light quality. Reflectors fill shadows and add catchlights; diffusers soften hard light and reduce contrast. Together they improve skin, preserve texture where needed and help you produce consistent, professional results — especially for portraits and product work.
Choose size by subject and the look you want. Larger modifiers (big diffusers or reflectors) give softer light and wider coverage — ideal for groups or full‑body portraits. Smaller modifiers offer tighter control for headshots or detail work. Remember distance: larger modifiers work best close to the subject for maximum softness; smaller ones can sit further away and remain effective.
Yes — layering is powerful. Use a diffuser to soften your key and a reflector to return fill on the opposite side. Multiple reflectors let you shape light selectively; combining scrims and softboxes gives wide, even coverage with direction. Try combinations (for example, a clamshell with a flash umbrella) to find what suits your scene.
Avoid poor placement and colour contamination. Keep reflectors at the right angle and distance to prevent flattening; don’t leave diffusers so far away that softness is lost. Watch for nearby coloured surfaces that can cast tints. Regular test shots will catch problems early.
Set up a controlled space and run small experiments: change one variable at a time (reflector surface, diffuser distance, angle) and shoot test frames. Work with different subjects and materials so you learn how light behaves. Regular practice in a studio lets you iterate quickly and build reliable lighting recipes; a reflector stand helps with precise adjustments.
Learn


.webp)
