December 16, 2025

Creative framing is the intentional use of elements inside and around a scene to define a subject, guide the viewer’s eye and strengthen the story a photograph tells. This guide walks you through studio-friendly composition framing approaches—architectural, natural, light-and-shadow, foreground and reflective—showing how each method changes perception, steers attention and improves commercial outcomes like engagement and product conversion. In a studio you can control depth of field, camera angle and light to build repeatable framed compositions that support brand narratives or editorial moods. We map core techniques to studio setups, recommend lenses and modifiers, and outline how to plan a session for quick, efficient experimentation. You’ll learn framing strategies for product, fashion and beauty shoots, how to choose gear and modifiers, and how to iterate fast during a booked studio slot. At the end there’s a short note on testing these setups at Bohemia Bay Studio — our self-access, fully equipped space in Cheltenham.
Creative framing describes compositional tactics that place secondary elements around or in front of a subject to direct focus, suggest context and add depth. These composition framing techniques work by manipulating focus, contrast and perspective so the viewer lands where you want them to, sharpening narrative and mood. For commercial shoots, framing raises perceived product value, highlights features for e-commerce and sculpts atmosphere for fashion and beauty. Below we define the main categories and give concise studio notes so each technique is immediately usable on controlled shoots. If you want to practice them in a professional space, Bohemia Bay Studio in Cheltenham, Melbourne offers a fully equipped, self-access studio that’s easy to book online.
Framing improves composition by isolating the subject, setting contextual clues and creating a clear visual path for the eye. By shaping negative space, adding leading lines or placing foreground elements, you control emphasis and imply relationships between subject and environment. In commercial work, framing highlights product texture and finish — details that build buyer confidence and lift conversions. The studio setting makes it simple to fine-tune light and background so framed compositions match a brand’s tone or an editorial mood before delivery. That understanding leads directly into the specific framing types photographers rely on.
Creative framing breaks down into practical categories, each serving different compositional goals and emotional cues: architectural framing, natural framing, light-and-shadow framing, foreground framing and reflective framing. In a studio you can build architectural frames from set pieces, create natural frames with fabrics or foliage, shape light-and-shadow with modifiers and gobos, place foreground objects close to the lens, or use mirrors and polished surfaces for reflective frames. The right choice depends on whether you want to simplify, contextualise or dramatise the subject — and each technique suggests different lens choices and depth-of-field strategies.
Architectural framing uses built or staged structures — doorways, arches, cyclorama edges and risers — to enclose a subject and create a clear focal hierarchy. These frames add geometric boundaries and scale cues that guide the eye and emphasise subject placement in the set. Camera angle, focal length and subject distance are your main levers for how dominant an architectural frame appears: wider lenses increase perceived depth and enclosure, while longer lenses compress space for tighter, more formal frames. In the studio, placing a subject in a doorway or against a curved cyclorama edge delivers a minimalist, modern frame that works well for both e-commerce and editorial imagery.
Elements like cyclorama edges, door openings, risers and temporary flats let you craft architectural frames that feel intentional and repeatable. A white cyclorama creates a subtle, seamless frame for clean product and fashion shots, while risers and flats introduce strong vertical or horizontal lines that lead the eye. Match a 35–85mm lens to the compression you want and use a moderate aperture to keep the subject sharp while retaining shape in the frame. Controlled lighting — a soft key with slight back separation — helps the frame read without overwhelming the subject, and small placement tweaks can move a composition from static to dynamic quickly.
Leading lines and geometric shapes pull the eye through the frame and add momentum to otherwise static studio shots. Set pieces, props or the fall of light can form visual corridors that point to the subject and enhance depth. To use them well, position the camera so converging elements intersect near your subject and choose perspective to favour movement or symmetry, depending on the mood. Combine lines with selective focus and controlled lighting to keep the subject clear while using foreground and architectural cues to enrich the story.
Natural frames use organic props and materials — fabrics, foliage and textured backdrops — to soften edges, add warmth and suggest a narrative around the subject. They introduce texture, colour and context that complement the subject without cluttering the frame. In studio work, natural frames give controlled environmental cues: a draped fabric suggests motion and softness for beauty, while foliage adds texture and a lifestyle feel for apparel and accessories. Lit correctly, natural frames balance context and emphasis, increasing perceived authenticity and emotional resonance.
Items like fabric swathes, potted foliage, translucent paper and textured boards make effective natural frames and should be chosen to match the brand’s palette and material tone. Fabric creates flowing lines and soft edges that flatter skin and convey motion; foliage adds texture that complements product finishes or garment detail. Think scale: oversized leaves for fashion, delicate fabrics for beauty, small organic elements for product close-ups. The right choice sets you up to light those elements so they read as frames rather than distractions.
Lighting natural frames is about balance: key, fill and backlight should let the frame read without overpowering the subject. Backlight or rim light separates foreground elements from your subject, while a soft key preserves flattering skin tones and product finishes. Use a narrower aperture when you want foreground elements to hold detail, and open up the aperture when the frame should be suggestive rather than literal. Start with a three-light setup — key, fill and rim — then refine intensities with grids, flags or small reflectors until the frame supports rather than competes.
Light and shadow are flexible framing tools that can carve a subject out of the scene or paint edges with contrast, turning negative space into a compositional asset. With modifiers like grids, snoots and gobos you can create bands, patterns or masked areas that act as temporary frames. These techniques change shape and mood without adding physical elements — a streamlined way to add editorial drama or product focus. Controlling shadow density and edge hardness lets you emphasise texture, silhouette and depth while keeping exposure balanced across the frame.
Certain modifiers give reliable shadow-based frames: a snoot throws a narrow pool of light, grids concentrate light for vignetting, and gobos project patterned shadows that can read as architecture. Use a snoot to pick out a product detail or create a halo around a face; use a grid to keep light off the background and build subtle framing; use a gobo to suggest window patterns and add narrative. Meter carefully — the key-to-fill ratio determines whether the frame feels soft and cinematic or stark and graphic — and combine with backlight to keep your subject separated from shadow.
Shadows create depth by visually separating foreground, midground and background, making flat scenes feel three-dimensional. Hard shadows sharpen contours and accentuate texture; soft shadows model form and flatter skin or product surfaces. The trick is to place shadows so they support the subject: flag unwanted spill, add rim light to lift edges, and manage contrast so you keep detail in highlights and shadows. When used deliberately as framing devices, shadows guide the eye and reinforce the subject’s shape while contributing mood.
Foreground framing uses objects positioned between lens and subject to create layered depth, intimate context or painterly blur that enhances focus on the subject. This approach to photography framing for portraits relies on shallow depth of field and precise focus so the foreground becomes a soft veil while the subject stays sharp — a three-dimensional look that reads well online. For product shots foreground elements can imply scale or use-case; for portraits they create intimacy and environment. Choose foreground objects and apertures carefully so the frame adds storytelling value rather than distraction.
For pleasing foreground blur, place the object close to the lens and focus on the subject, using a wide aperture to render the foreground soft and unobtrusive. Distance between foreground and subject, plus focal length, determines blur size and character — closer foregrounds and wider apertures give larger, creamier bokeh. For product close-ups try a 50mm macro or 85mm short-telephoto at f/1.8–f/4; for portraits, this photography framing for portraits technique uses 85–135mm at f/2–f/4 to keep faces sharp while preserving layered depth. Swap foreground elements quickly during a session to experiment with texture and colour interaction.
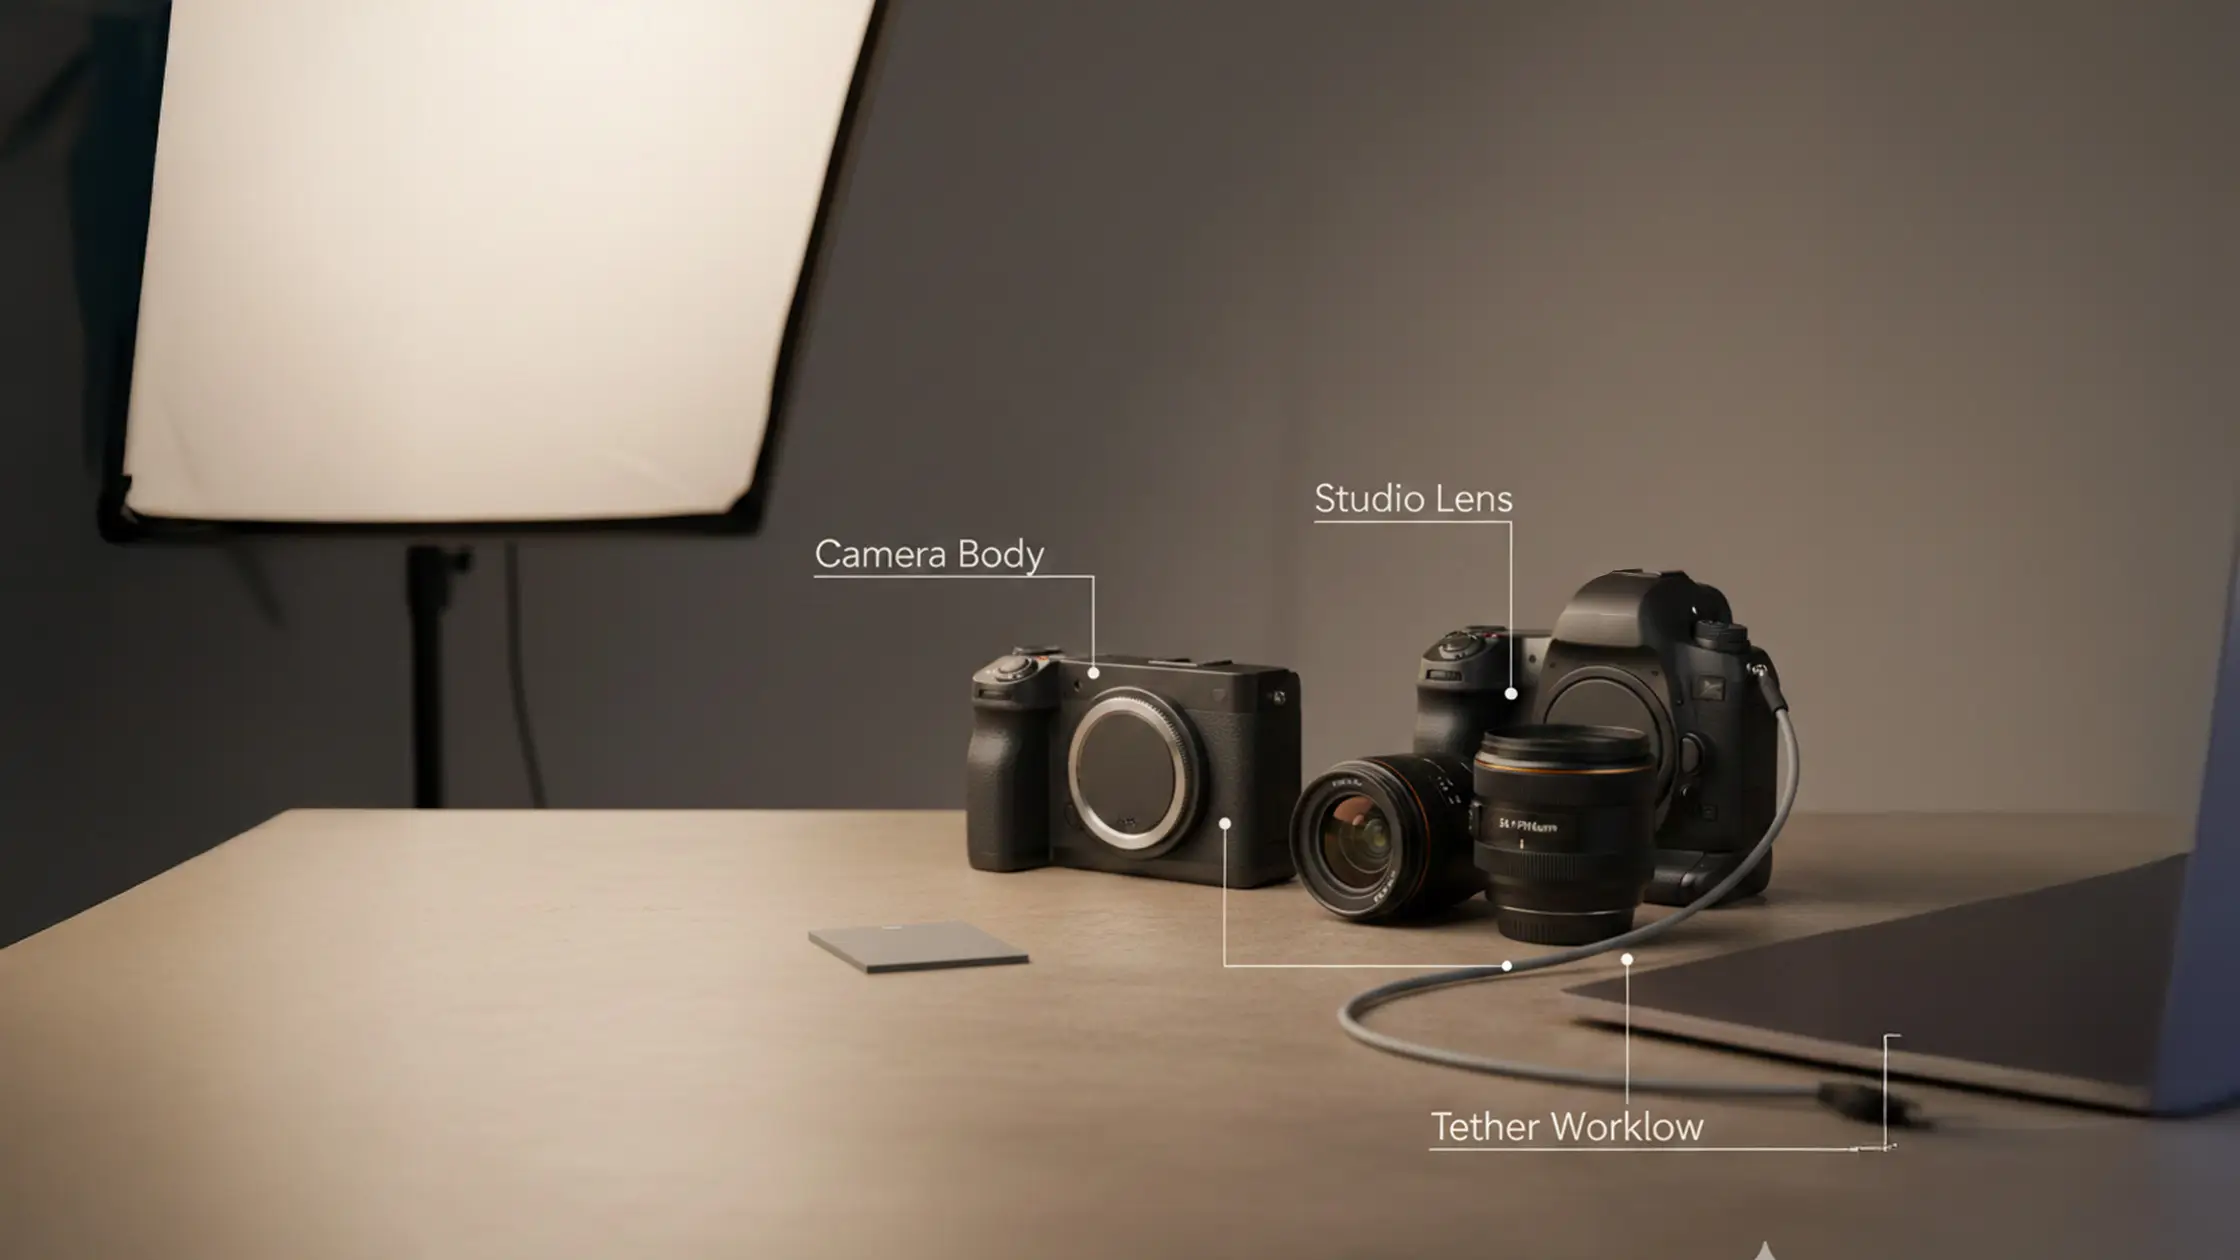
A compact kit supports foreground framing: clampable props and small stands, macro or short-telephoto lenses for compression control, and extension tubes for tight product work. Everyday items like plexiglass, glassware or small plants make useful foregrounds when secured safely. A 50mm or 85mm prime is often the most flexible choice for both product and portrait framing, while macro glass is essential for extreme close-ups. Clamps and sandbags keep things safe, and light modifiers prevent unwanted highlights from the foreground.
Creative framing tailors the viewer’s experience to the commercial goal: clarity and trust for e-commerce, narrative and mood for fashion editorials, and flattering focus for beauty campaigns. For product photography, minimalist frames reduce distraction and bring attention to features; for fashion, layered frames and implied motion emphasise silhouette and fabric flow; for beauty, tight frames and soft foregrounds highlight texture and makeup. Framing choices shape perceived quality, so plan compositions that show scale, texture and use context to increase engagement and conversions. Below are practical approaches for each genre with studio-friendly techniques you can test immediately.
E-commerce benefits from minimalist architectural framing and generous negative space that keeps attention on product detail, material and function. Use the cyclorama and clean backdrops to strip context and add subtle foreground hints for lifestyle cues without clutter. Consistent, tight framing across product sets helps customers compare items and builds trust through reproducible presentation. Prioritise even, soft lighting and shallow-to-moderate depth of field to show texture while keeping the silhouette clear.
Fashion and beauty thrive on narrative frames that combine movement, texture and selective focus to create atmosphere. Use foreground elements to suggest motion and reflective surfaces to accent hair and makeup. Collaborate closely with stylists and makeup artists so framed compositions highlight silhouette, texture and colour; deliberate posing and directional light then sculpt form. Plan a sequence of frames — from wide contextual shots to tight details — so the story reads naturally across an editorial layout.
Bohemia Bay Studio is a self-access hire space in Cheltenham, Melbourne with a full kit (professional lighting and a white cyclorama included). We support commercial photographers, e-commerce shoots, beauty and fashion work, content creators, stylists, makeup artists and production teams. The studio’s assets — cyclorama, lighting kit, backdrops, props and flexible set area — directly support the framing techniques described here, making it easy to test and produce framed compositions efficiently. Use the self-access system and adjustable fixtures to prototype architectural frames, test natural props, and dial in shadow-based framing with grids and gobos during a single booked session.
Trusted by Melbourne brands: Air Aroma, Dress Lab, MAKU the Label, WAG, Crumble Cookware, Engine Swim
"Beautiful, clean and modern space with everything you could need." — Simone Shiers, Photographer
Each studio feature maps to specific framing strategies: the white cyclorama is a minimalist canvas for negative-space framing and product focus; the lighting kit and modifiers enable shadow- and gobo-based framing for drama; props and backdrops provide natural or textured foregrounds; and the self-access setup lets you iterate quickly without an external operator. Recommended setups include cyclorama + softbox for e-commerce, grid + snoot for beauty accents, and layered fabric + rim light for fashion movement. Use these mappings to plan gear and shot order before you arrive so you get the most from your booked time.
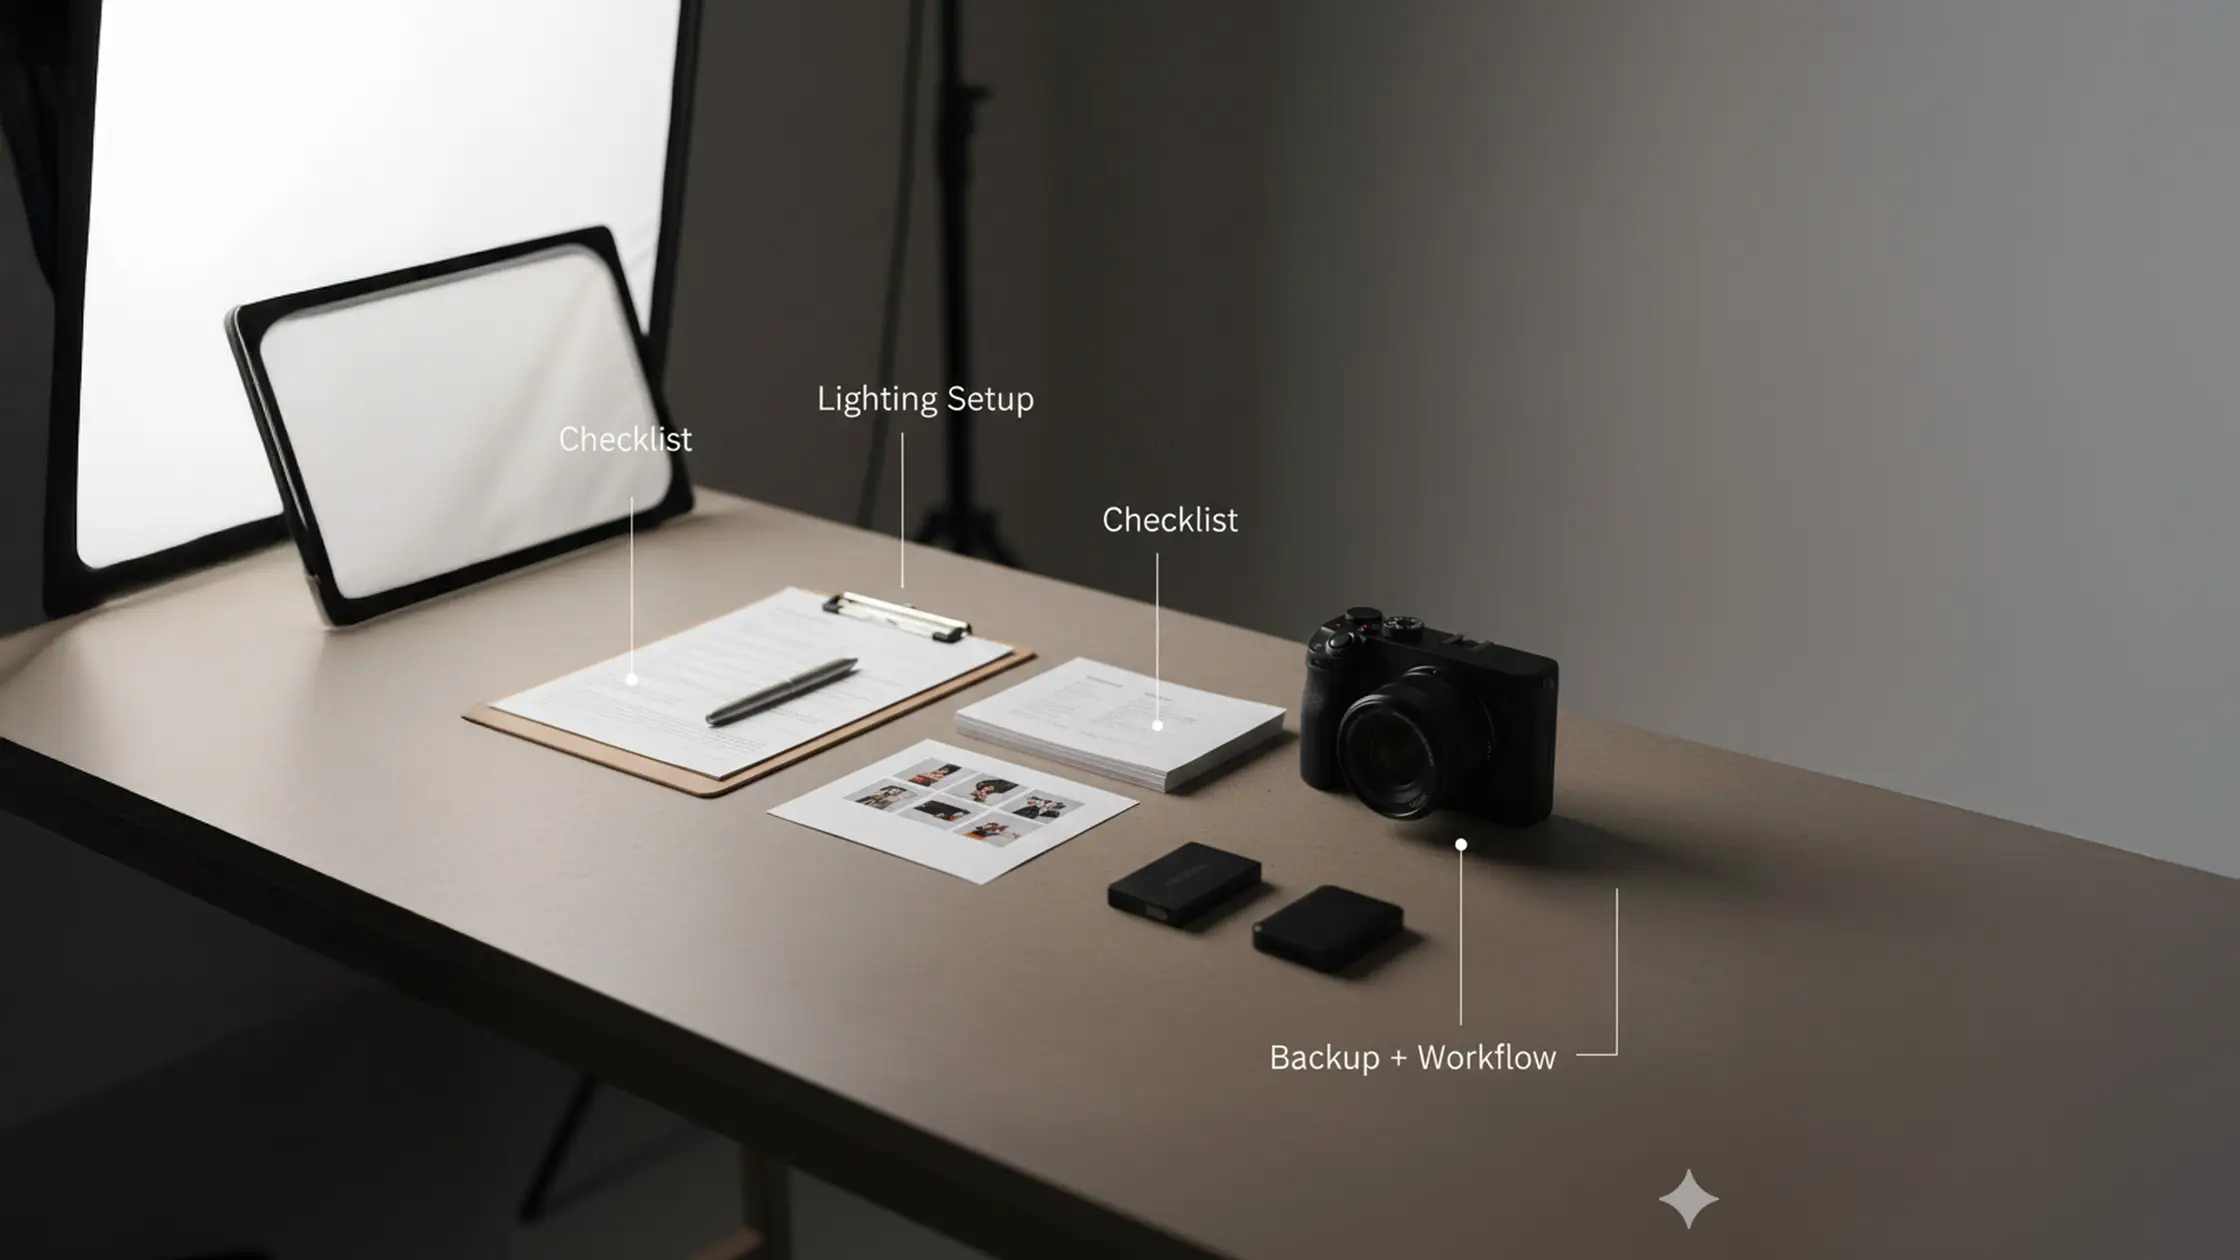
Before your session, make a shot list that names the framing types to test, required props, lens choices and a quick exposure plan so studio time is focused and productive. Bring clamps and small stands for foreground props, a 50mm and 85mm prime for portraits and product detail, and a selection of fabrics or foliage for natural frames; pack backup gels and reflectors for shaping light. On arrival, use the self-access system to set the space and test modifier positions, then run a few control shots to confirm focus and how the frame reads. This preparation helps turn ideas into polished, framed assets during your booked slot.
Summary: A structured plan makes the studio’s features work for you, turning framing experiments into repeatable results.
Mastering framing is iterative: begin with simple setups, change one variable at a time, and record results to build repeatable recipes. Think in small cause-effect statements — “Foreground object → creates → visual depth”; “Grid modifier → concentrates → light to sculpt an edge”; “Cyclorama → provides → negative-space framing.” Keep a shoot log of camera settings, distances and modifier positions so winning frames can be reproduced across client work. Critique frames for distractions and simplify until the intended focal hierarchy is clear.
Try focused drills: limit yourself to one backdrop and two modifiers, then cycle foreground props and focal lengths to observe consistent effects. Use time-boxed exercises — 30 minutes per framing type — to encourage quick iteration without overworking a single idea. Photograph each variation with the same exposure and then change only one variable (aperture, distance or modifier angle) to isolate its impact. Document outcomes and build a short library of go-to setups for different briefs to speed future shoots and client approvals.
These exercises speed learning and create a practical workflow for framed shoots.
Common pitfalls include cluttered frames that compete with the subject, incorrect depth-of-field that pulls foreground and subject into equal focus, and uncontrolled shadows that hide detail. Don’t place unsecured foreground elements too close to the lens; preflight your lighting so rim or backlight separates rather than hazes the subject. Use incremental changes and your shot log to identify issues quickly, and always preview images at delivery size to ensure framing choices translate across final formats.
Final note: When you’re ready to test these tips in a professional environment, book a session at Bohemia Bay Studio to use the cyclorama, lighting kit and self-access workflow for rapid iteration on framed compositions.
Planning matters because it helps you visualise the end result and make clear choices about composition, lighting and props. A concise shot list prioritises framing techniques and ensures you have the right kit ready. Good preparation reduces time wasted during a session and frees you to experiment with confidence. With a plan you can focus on execution and deliver images that meet client expectations.
Get hands-on: experiment with different modifiers and note how each one alters light quality and direction. Practice backlighting and rim lighting to build depth and separation, and study how snoots, grids and gobos shape shadow. Review your images critically to see what works, and look at other photographers’ portfolios for inspiration. Over time you’ll develop an intuitive sense for using light and shadow as framing tools.
Choose props by colour, texture and scale so they support — not distract from — the subject. Soft fabrics add motion and warmth, foliage brings texture and life, and small organic elements work well for close-ups. Test arrangements and lighting to see how props interact with the subject, and scale them to suit the intended shot: oversized elements for fashion, delicate materials for beauty, and compact props for product work.
Negative space clarifies focus and creates a sense of isolation or emphasis around your subject. Position the subject so there’s deliberate room around it, and experiment with different amounts of empty space to see how the mood changes. Pay attention to background and light so the negative space complements the subject rather than competing with it — a powerful technique for product and fashion photography.
Depth of field controls how much of the scene is in focus and strongly affects how viewers perceive the subject. A shallow DOF isolates the subject and blurs distractions; a deeper DOF keeps more context sharp for environmental portraits or storytelling images. Mastering aperture choices and focal lengths lets you direct attention precisely and enhance the emotional impact of each frame.
Develop standard practices and document them. Keep a shot log with camera settings, lighting setups and framing notes from successful shoots. Reuse proven equipment and prop choices where appropriate and refine your workflow based on feedback. A consistent approach helps you deliver a recognisable aesthetic and speeds client approvals.
Typical challenges include managing distracting elements, achieving the right depth of field and using light and shadow without overpowering the subject. Balancing foreground and background, and preventing clutter are common hurdles. The best remedy is practice: experiment regularly, review your work critically and refine your approach so framing becomes a reliable part of your visual toolbox.
Explore More Insights from The Studio